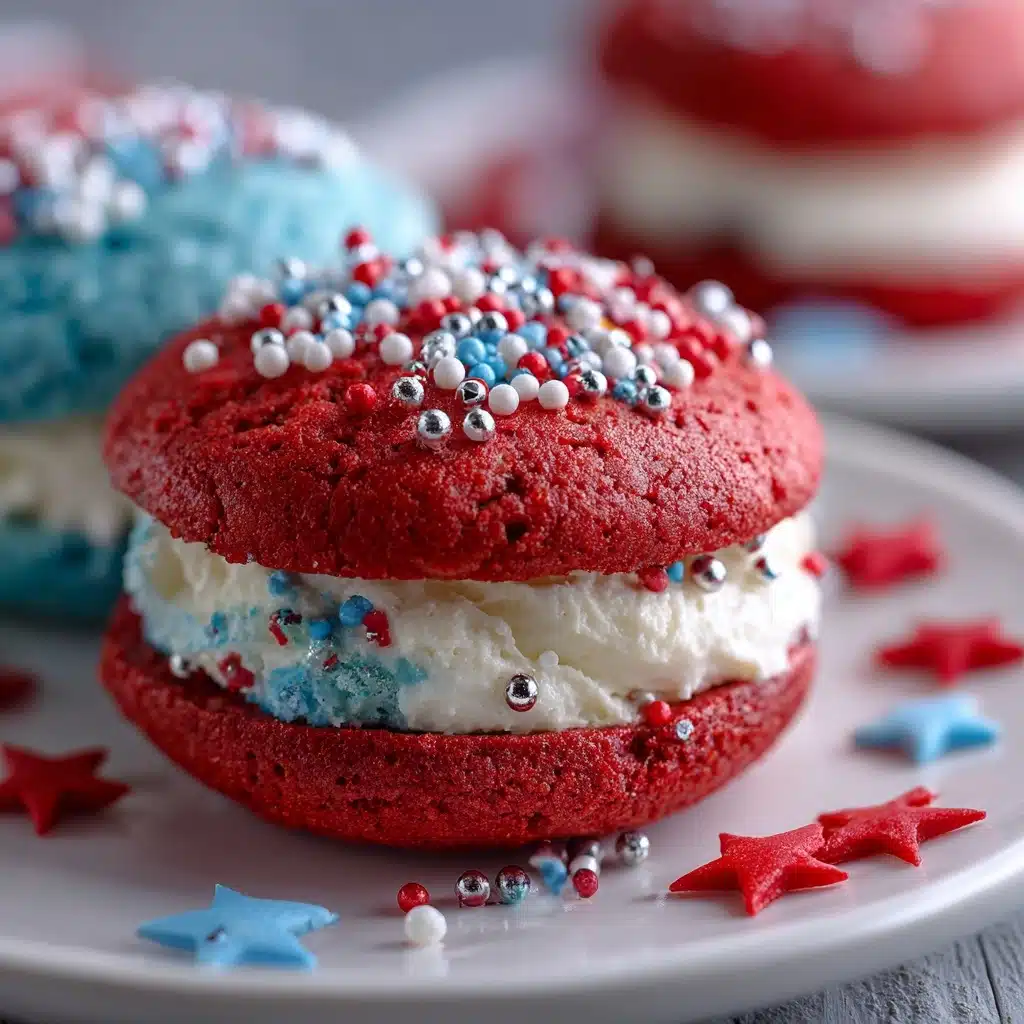
If you’re searching for a showstopping dessert that combines playful color, delicious flavor, and a dash of nostalgia, you’re in for a treat with this Red, White and Blue Whoopie Pies Recipe. These soft, cake-like sandwich cookies are filled with a dreamy marshmallow buttercream and tinted in festive hues, making them perfect for patriotic gatherings, summer parties, or any occasion that calls for a little extra fun. Both kids and adults love the tender chocolate cakes and creamy filling, and the bold red, white, and blue colors make every bite as festive as it is tasty.
Ingredients You’ll Need
The magic of the Red, White and Blue Whoopie Pies Recipe lies in how a handful of pantry staples come together to create pure joy. Each ingredient plays its part, from delivering rich chocolate flavor to giving that luscious, fluffy filling and vibrant color.
- All-purpose flour: The backbone of the cake, giving structure and a soft, tender crumb.
- Unsweetened cocoa powder: Adds deep chocolate flavor and a beautiful base for the colored cakes.
- Baking soda: Essential for lift and that signature whoopie pie puff.
- Salt: Balances sweetness and enhances all the flavors.
- Unsalted butter (softened): Brings richness to both the cakes and the filling; make sure it’s truly soft for easy mixing.
- Granulated sugar: Sweetens the cakes and helps achieve that soft, cake-like bite.
- Large egg: Binds everything together and adds tenderness.
- Vanilla extract: Adds warmth and depth to both the cake and the dreamy filling.
- Buttermilk: Gives the cakes extra moisture and just a hint of tang to balance the sweet filling.
- Red and blue gel food coloring: Use gel for bold, vibrant colors without thinning the batter.
- Powdered sugar: Creates a silky-smooth filling that’s sweet but not gritty.
- Marshmallow creme: The secret to that fluffy, gooey filling that makes whoopie pies irresistible.
- Heavy cream: Just a splash ensures the filling is perfectly light and spreadable.
How to Make Red, White and Blue Whoopie Pies Recipe
Step 1: Prepare Your Baking Sheets
Preheat your oven to 350°F and line two baking sheets with parchment paper. This step prevents sticking and makes cleanup a breeze. Having your sheets ready means you can scoop and bake without delay once your batter is mixed.
Step 2: Mix the Dry Ingredients
In a medium bowl, whisk together the flour, unsweetened cocoa powder, baking soda, and salt. This ensures even distribution of the leavening and cocoa, so every bite of your Red, White and Blue Whoopie Pies Recipe is perfectly tender and chocolatey.
Step 3: Cream Butter and Sugar
In a large mixing bowl, beat the softened butter and granulated sugar until the mixture is light and fluffy. This should take about 2-3 minutes and helps the cakes bake up soft and airy. Don’t rush this step; proper creaming makes a big difference.
Step 4: Add Egg and Vanilla
Beat in the egg and vanilla extract until just combined. The egg provides structure, while the vanilla infuses the batter with comforting, classic flavor.
Step 5: Combine Wet and Dry Ingredients
With your mixer on low, alternate adding the dry ingredients and buttermilk to the butter mixture, starting and ending with the dry. Mix just until everything is combined and no streaks remain. Over-mixing can make the cakes tough, so stop as soon as the batter comes together.
Step 6: Tint and Portion the Batter
Divide the batter evenly among three bowls. Leave one bowl as is for the white cakes, tint one with red gel food coloring, and the last with blue. Stir gently until each batter is vibrantly colored. Using a tablespoon or small scoop, drop rounds onto your prepared baking sheets, spacing them about 2 inches apart.
Step 7: Bake and Cool
Bake in your preheated oven for 10–12 minutes, or until the cakes spring back when lightly touched. Allow the cakes to cool on the baking sheets for 5 minutes, then transfer to a wire rack to cool completely before assembling.
Step 8: Make the Filling
For the signature whoopie pie filling, beat the softened butter until creamy. Gradually add powdered sugar, marshmallow creme, vanilla, and heavy cream, and continue beating until the mixture is fluffy and smooth. The result should be light, cloud-like, and easy to spread.
Step 9: Assemble the Whoopie Pies
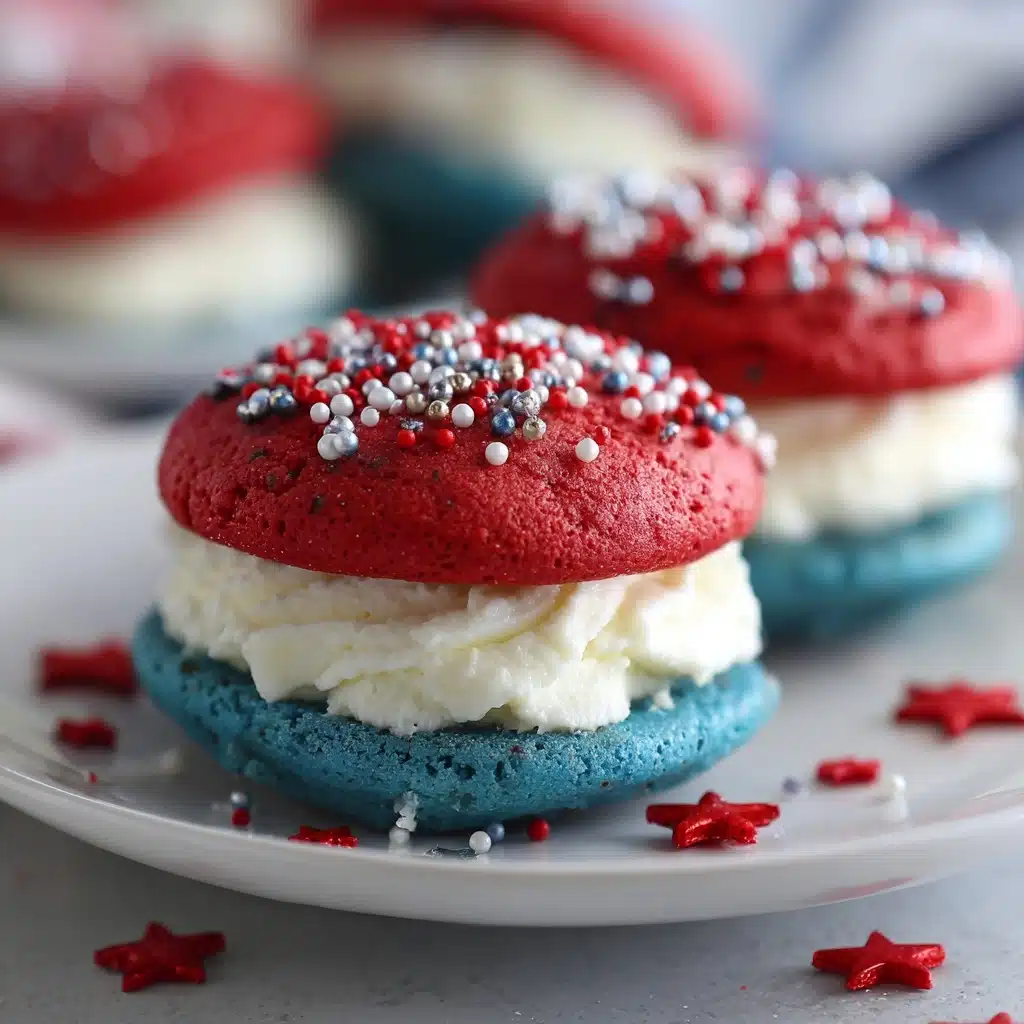
Pair up your red, white, and blue cakes, then sandwich a generous dollop of marshmallow filling between them. For extra neatness, use a piping bag to apply the filling. Gently press together and marvel at your homemade Red, White and Blue Whoopie Pies Recipe!
How to Serve Red, White and Blue Whoopie Pies Recipe
Garnishes
For a festive touch, roll the edges of your assembled whoopie pies in patriotic sprinkles, or dust lightly with powdered sugar for a whimsical effect. You can even drizzle a little melted white chocolate across the tops for extra flair.
Side Dishes
These whoopie pies are perfect on their own, but they’re also delightful alongside a scoop of vanilla ice cream or a pitcher of icy-cold lemonade. For a party, serve them with a tray of fresh berries or a fruit salad to play up the red, white, and blue theme.
Creative Ways to Present
Stack your Red, White and Blue Whoopie Pies Recipe high on a tiered dessert stand for a dramatic centerpiece, or wrap them individually in cellophane bags tied with ribbon for party favors. They also look adorable arranged in a flag pattern for a patriotic dessert table.
Make Ahead and Storage
Storing Leftovers
Keep any leftover whoopie pies in an airtight container at room temperature for up to 2 days. For longer freshness, pop them in the fridge, but let them come to room temperature before serving so the filling softens up and the cakes taste their best.
Freezing
You can freeze your Red, White and Blue Whoopie Pies Recipe for up to one month. Place them in a single layer on a baking sheet to freeze solid, then transfer to a zip-top bag or airtight container. Thaw at room temperature before enjoying.
Reheating
While these are best enjoyed fresh, if you’d like to gently soften a chilled or frozen whoopie pie, let it sit at room temperature for about 30 minutes. If you prefer a slightly warm treat, microwave for 10–15 seconds, just until the filling is soft and the cake is tender.
FAQs
Can I use liquid food coloring instead of gel?
Gel food coloring is preferred for this recipe because it provides vibrant colors without thinning the batter. Liquid food coloring can work in a pinch, but you may need more to achieve the same intensity, and it could slightly affect the cake’s texture.
What’s the best way to get even-sized cakes?
Using a tablespoon or a small cookie scoop ensures uniform size, so your Red, White and Blue Whoopie Pies Recipe sandwiches together evenly. If you want ultra-neat edges, you can lightly shape the batter with damp fingers before baking.
Can I make the filling ahead of time?
Absolutely! The marshmallow buttercream can be made up to two days in advance. Store it in the refrigerator, bring to room temperature, and re-whip briefly before spreading or piping onto your cakes.
Is there a dairy-free option?
Yes, you can substitute plant-based butter and non-dairy milk (with a splash of lemon juice for tang) in both the cakes and filling to make a dairy-free version. The texture and taste will be slightly different, but still delicious.
How do I keep the colors from bleeding?
For bold, clean colors in your Red, White and Blue Whoopie Pies Recipe, use gel food coloring and avoid over-mixing once the color is added. Make sure the cakes are completely cool before assembling to prevent the filling from melting and colors from running.
Final Thoughts
If you’re craving a dessert that’s as fun to make as it is to eat, you’ll love this Red, White and Blue Whoopie Pies Recipe. Whether you’re baking for a holiday or just because, these colorful treats are guaranteed to bring smiles and a little extra sparkle to your table. Give them a try, and don’t be surprised if they become a new tradition!
Print
Red, White and Blue Whoopie Pies Recipe
- Total Time: 42 minutes
- Yield: 12 whoopie pies 1x
- Diet: Vegetarian
Description
Celebrate any patriotic occasion with these festive Red, White, and Blue Whoopie Pies. Soft, rich chocolate cakes tinted in vibrant red and blue hues sandwich a fluffy marshmallow and buttercream filling, creating a deliciously fun and eye-catching dessert perfect for the 4th of July or any celebration.
Ingredients
Cake Ingredients
- 2 cups all-purpose flour
- 1/2 cup unsweetened cocoa powder
- 1 1/4 teaspoons baking soda
- 1/2 teaspoon salt
- 1/2 cup unsalted butter (softened)
- 1 cup granulated sugar
- 1 large egg
- 1 teaspoon vanilla extract
- 1 cup buttermilk
- Red gel food coloring
- Blue gel food coloring
Filling Ingredients
- 1 cup unsalted butter (softened)
- 2 1/2 cups powdered sugar
- 1 (7 oz) jar marshmallow creme
- 1 teaspoon vanilla extract
- 1–2 tablespoons heavy cream
Instructions
- Preheat Oven and Prepare Dry Ingredients: Preheat your oven to 350°F and line two baking sheets with parchment paper. In a medium bowl, whisk together the all-purpose flour, unsweetened cocoa powder, baking soda, and salt until evenly combined.
- Mix Wet Ingredients and Combine: In a large bowl, beat the softened butter and granulated sugar together until the mixture is light and fluffy. Add in the egg and vanilla extract, beating well to incorporate. Alternately add the dry ingredients and buttermilk to the butter mixture, stirring just until everything is combined to keep the batter light.
- Divide and Color Batter: Evenly divide the batter into three separate bowls. Leave one bowl plain for the white cakes. Add red gel food coloring to the second bowl, and blue gel food coloring to the third, mixing each until the color is fully incorporated.
- Scoop and Bake: Using a tablespoon or small scoop, drop spoonfuls of batter onto the prepared baking sheets, spacing each about 2 inches apart to allow for spreading. Bake in the preheated oven for 10 to 12 minutes, or until the cakes spring back when lightly pressed.
- Cool Cakes: Let the cakes cool on the baking sheet for about 5 minutes, then transfer them to a wire rack to cool completely to prevent sogginess and promote even texture.
- Prepare Filling: In a clean bowl, beat the softened butter until creamy. Gradually add powdered sugar, marshmallow creme, vanilla extract, and heavy cream, continuing to beat until the filling is fluffy, smooth, and easily spreadable.
- Assemble Whoopie Pies: Once the cakes are completely cool, spread a generous dollop of the marshmallow filling onto a white (plain) cake, then top with a red or blue cake to create a bright, colorful sandwich. Repeat to create 12 festive whoopie pies.
Notes
- Use a piping bag to apply the filling for tidier edges and a more professional look.
- Store the whoopie pies in an airtight container at room temperature for up to 2 days.
- For longer freshness, refrigerate the pies and bring to room temperature before serving.
- These whoopie pies make a perfect dessert for 4th of July or any patriotic celebration.
- Prep Time: 30 minutes
- Cook Time: 12 minutes
- Category: Dessert
- Method: Baking
- Cuisine: American
Nutrition
- Serving Size: 1 whoopie pie
- Calories: 390
- Sugar: 35 g
- Sodium: 210 mg
- Fat: 20 g
- Saturated Fat: 12 g
- Unsaturated Fat: 7 g
- Trans Fat: 0 g
- Carbohydrates: 50 g
- Fiber: 1 g
- Protein: 3 g
- Cholesterol: 60 mg


