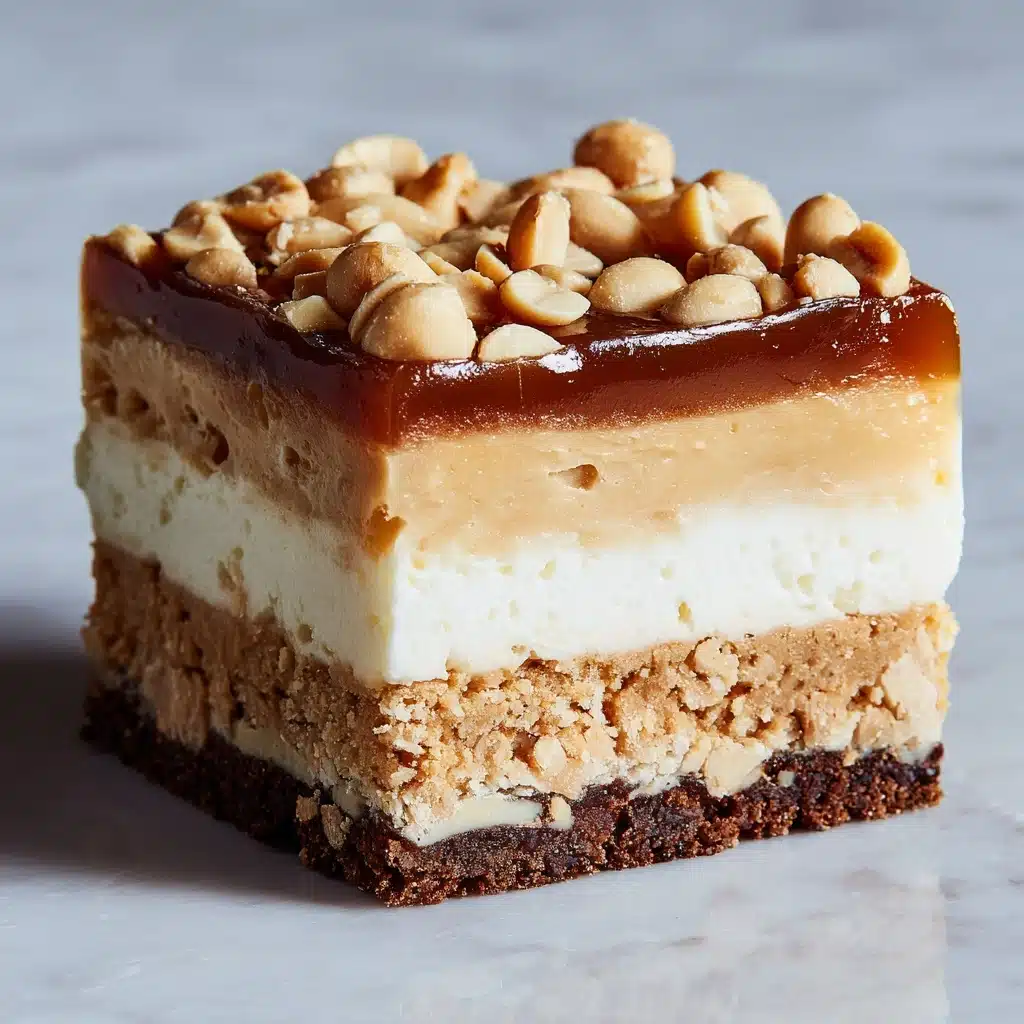
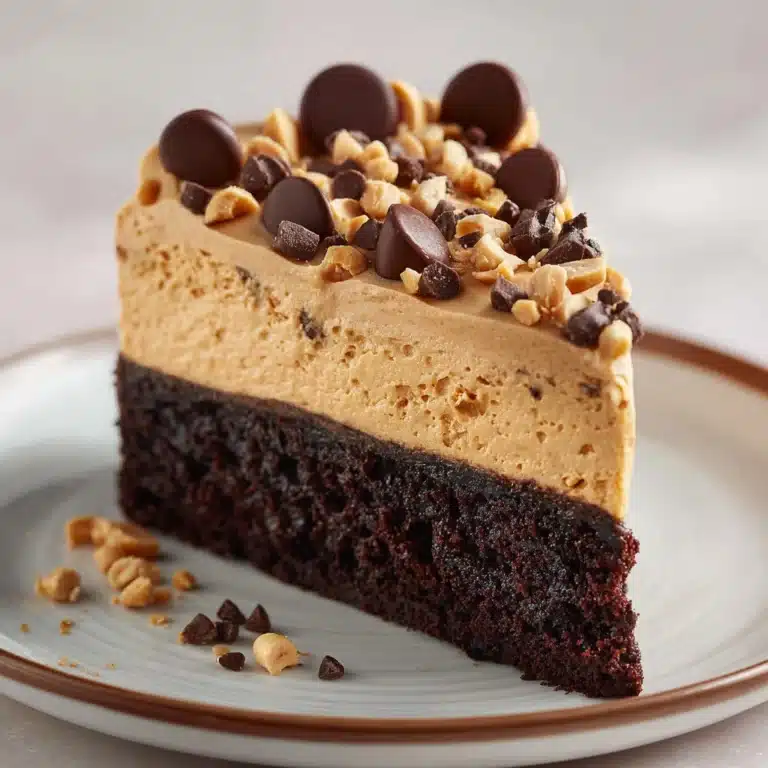
Imagine the ultimate marriage of chocolate and peanut butter in dessert form: these Peanut Butter Dream Bars are a no-bake delight with layers of creamy, nutty, and chocolatey goodness all nestled on a buttery graham cracker crust. Every bite is rich, cool, and utterly nostalgic, making them a surefire hit for family gatherings, potlucks, or whenever your sweet tooth demands a moment of pure bliss. Whether you’re a seasoned home baker or just starting out, you’ll love how effortlessly these bars come together—and how quickly they disappear!
Ingredients You’ll Need
Let’s talk about the magic of simplicity! Each ingredient for Peanut Butter Dream Bars has a special role in building layers of contrasting flavors and dreamy textures that will make everyone ask for seconds. Here’s the lineup and why they matter:
- Graham cracker crumbs: The golden foundation that brings a toasty crunch to every bite.
- Unsalted butter (melted): Binds the crumbs into a buttery, melt-in-your-mouth base.
- Powdered sugar: Dissolves smoothly for a creamy, sweet peanut butter layer without any grittiness.
- Creamy peanut butter: The star of the show, giving the bars their classic nostalgic flavor.
- Cream cheese (softened): Adds rich tang and keeps the peanut butter mixture extra luscious.
- Whipped topping (thawed): Lightens the filling, bringing an airy, mousse-like texture to the upper layers.
- Instant chocolate pudding mix: Delivers a deep chocolatey layer that’s smooth and easy to prepare.
- Cold milk: Activates the pudding mix for a swift, silky set without any stovetop fuss.
- Mini chocolate chips (optional): They’re the finishing touch for a little extra chocolate crunch and flair.
How to Make Peanut Butter Dream Bars
Step 1: Prepare the Crust
Start things off by mixing your graham cracker crumbs with the melted butter in a medium bowl. You want every crumb glistening and fully coated, creating a mixture that will press neatly into the bottom of your 9×13-inch pan. This is your base layer—it’s the sturdy, buttery bed for all that creamy goodness to come.
Step 2: Whip Up the Peanut Butter Layer
In a separate bowl, blend powdered sugar, creamy peanut butter, and softened cream cheese until velvety and smooth. This step is where the magic happens: the mixture turns indulgently rich and thick. Gently fold in half the whipped topping, which lightens the filling into a dreamy mousse. Spread this peanut butter cloud evenly across your prepared crust.
Step 3: Make the Chocolate Layer
Now for a chocolatey surprise! In a clean bowl, whisk together the instant chocolate pudding mix and cold milk until the mixture thickens up, usually about 2 minutes of steady whisking. Once set, smooth the pudding in an even layer on top of the peanut butter filling—it’s the perfect contrast in both color and flavor.
Step 4: The Finishing Touch
Top everything off with the remaining whipped topping, spreading it out as smooth and elegantly as you like. If you’re feeling playful, sprinkle mini chocolate chips over the top for that extra bit of crunch and chocolate pop. Now, patience is key! Refrigerate your masterpiece for at least 4 hours, letting the layers meld and set until perfectly sliceable.
How to Serve Peanut Butter Dream Bars

Garnishes
Go for a final flourish with a handful of mini chocolate chips over the top, or take it up a notch with a drizzle of melted peanut butter or chocolate sauce. A tiny pinch of flaky sea salt can really make the flavors pop, offering a sophisticated touch to every square.
Side Dishes
Since Peanut Butter Dream Bars are rich and satisfying, pair them with something fresh and light. A crisp fruit salad or a dollop of tangy Greek yogurt on the side can balance out the sweetness perfectly. For a party platter, consider adding some crunchy pretzel rods or salted nuts for a fun salty-sweet spread.
Creative Ways to Present
Make these bars the star of your dessert table by serving them in mini cupcake liners as bite-sized treats, or layer portions into parfait glasses for an easy, elegant twist. For a festive presentation, add colorful sprinkles or edible glitter—perfect for birthdays or celebrations where you want Peanut Butter Dream Bars to really stand out!
Make Ahead and Storage
Storing Leftovers
Cover the Peanut Butter Dream Bars tightly with plastic wrap or transfer slices to an airtight container, then store in the fridge. These bars will stay fresh and creamy for up to 4 days, so they’re just as wonderful for tomorrow’s treat as they are right now.
Freezing
Absolutely, these bars freeze like a dream! Slice them first, then arrange in a single layer in a freezer-safe container with parchment between layers. They can chill out in your freezer for up to a month. To serve, just thaw overnight in the fridge.
Reheating
No need to reheat—these bars are meant to be enjoyed cold for that classic creamy-chocolatey sensation. If you’ve frozen them, let them gently thaw in the refrigerator before serving for best texture and taste.
FAQs
Can I use crunchy peanut butter instead of creamy?
Definitely! Crunchy peanut butter adds an extra layer of texture and nutty surprise to your Peanut Butter Dream Bars. Just expect a slightly more rustic, hearty filling that peanut lovers will adore.
Do I have to use whipped topping, or can I substitute fresh whipped cream?
Fresh whipped cream is a lovely alternative but can be a bit softer and less stable than store-bought whipped topping. If you choose whipped cream, whip it to stiff peaks and use immediately for best results.
Can I use a different crust base, like Oreos or digestive biscuits?
Absolutely, feel free to experiment! Oreo crumbs bring even more chocolate richness, while digestive biscuits offer a subtle, buttery sweetness. The key is making sure the base is well-bonded with melted butter for easy slicing.
How can I make this recipe gluten-free?
Just swap the graham crackers for your favorite gluten-free version or use gluten-free cookies. Make sure to double-check the other ingredients, but the rest of the recipe should be naturally gluten-friendly.
How far in advance can I make Peanut Butter Dream Bars?
You can make the bars up to 2 days ahead and store them, covered, in the refrigerator. The flavors will deepen and the layers will hold together beautifully—making them even easier for effortless entertaining.
Final Thoughts
If you’re searching for a dessert that’s as delightful to make as it is to eat, Peanut Butter Dream Bars are your ticket to instant joy. Their luscious layers, easy technique, and crave-worthy flavors make them a must-try for any occasion. Gather your ingredients, dive in, and treat yourself and your loved ones to this creamy, chocolatey, and peanut buttery celebration!
Print
Peanut Butter Dream Bars Recipe
- Total Time: 4 hours 20 minutes
- Yield: 12 servings 1x
- Diet: Non-Vegetarian
Description
Indulge in the creamy, dreamy goodness of these Peanut Butter Dream Bars. A luscious layered dessert featuring a graham cracker crust, peanut butter filling, chocolate pudding, and whipped topping, topped with mini chocolate chips for the perfect finish.
Ingredients
Graham Cracker Crust:
- 1 ½ cups graham cracker crumbs
- ½ cup unsalted butter, melted
Peanut Butter Filling:
- 1 cup powdered sugar
- 1 cup creamy peanut butter
- 1 (8 oz) package cream cheese, softened
- 1 (8 oz) tub whipped topping, thawed
Chocolate Pudding Layer:
- 1 (3.9 oz) package instant chocolate pudding mix
- 1 ½ cups cold milk
- ½ cup mini chocolate chips (optional for topping)
Instructions
- Prepare the Graham Cracker Crust: Mix graham cracker crumbs with melted butter, press into a 9×13-inch pan.
- Make the Peanut Butter Filling: Beat powdered sugar, peanut butter, and cream cheese until smooth. Fold in half of the whipped topping and spread over the crust.
- Layer the Chocolate Pudding: Whisk pudding mix with cold milk until thickened, spread over the peanut butter layer.
- Finish with Whipped Topping: Top with remaining whipped topping, sprinkle with mini chocolate chips if desired. Chill for at least 4 hours before serving.
Notes
- For a crunchier crust, bake the graham cracker base at 350°F for 8 minutes before assembling.
- Consider using chocolate graham crackers or adding chopped peanuts for extra texture.
- Prep Time: 20 minutes
- Cook Time: 0 minutes
- Category: Dessert
- Method: No-Bake
- Cuisine: American
Nutrition
- Serving Size: 1 bar
- Calories: 360
- Sugar: 24g
- Sodium: 280mg
- Fat: 23g
- Saturated Fat: 10g
- Unsaturated Fat: 12g
- Trans Fat: 0g
- Carbohydrates: 32g
- Fiber: 2g
- Protein: 6g
- Cholesterol: 25mg


