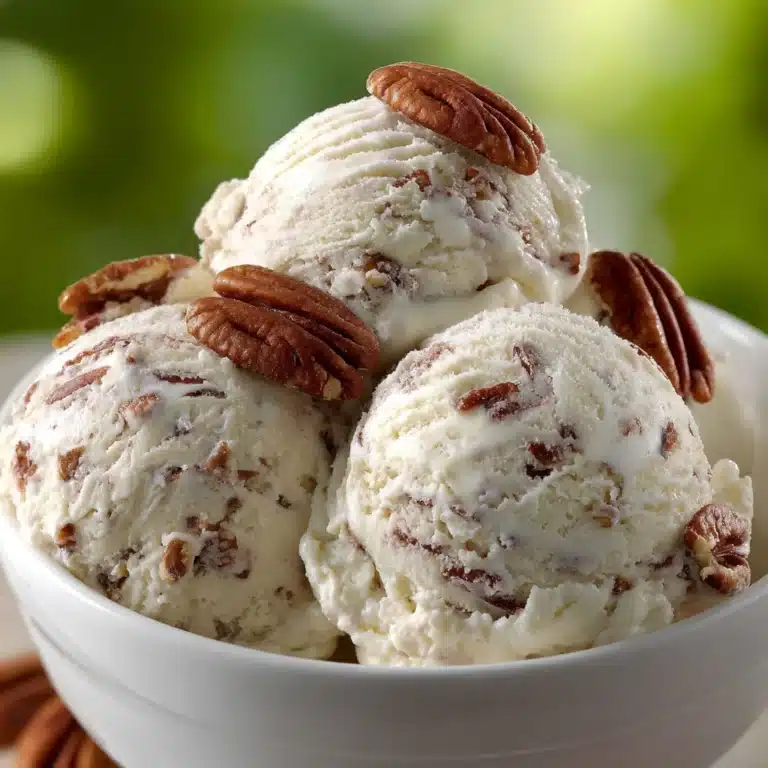
If you’re looking for a decadent treat that’s both impressive and surprisingly achievable at home, Homemade Salted Caramel Ice Cream is simply irresistible. Imagine creamy custard swirled with luscious, buttery caramel and finished with a hint of sea salt—it’s a dreamy combination that turns any day into a special occasion. Whether you’re hosting a summer gathering or just want to indulge yourself, this homemade creation delights every caramel lover, and you’ll love sharing it as much as you love eating it!
Ingredients You’ll Need

Ingredients You’ll Need
You’ll be amazed by how just a handful of simple ingredients come together to create such sophisticated flavor. Each one plays a crucial role—either sculpting that silky base, building the caramel foundation, or accenting with the perfect note of salt.
- Granulated sugar: This transforms into a golden, rich caramel, the backbone of our flavor.
- Unsalted butter: Adds body and buttery creaminess to the caramel sauce.
- Sea salt: A sprinkle is all it takes to heighten the sweet and make those caramel notes sing.
- Heavy cream: The secret to a smooth, scoopable, ultra-creamy texture—used in both the caramel and the custard base.
- Whole milk: Balances the richness, keeping the ice cream just light enough to be dangerously addictive.
- Vanilla extract: Complements the caramel with a warm, fragrant background.
- Large egg yolks: These are the magic makers for the custard, giving the ice cream its signature lushness.
How to Make Homemade Salted Caramel Ice Cream
Step 1: Caramelize the Sugar
Start with patience and a sharp eye: in a heavy-bottomed saucepan, melt the granulated sugar over medium heat, stirring constantly. You’re looking for that transformation moment—when the sugar turns from white sand into a rich, deep amber caramel. This is the backbone of Homemade Salted Caramel Ice Cream, and getting that color just right means more complexity in each bite.
Step 2: Make the Caramel Sauce
Once your sugar has reached that glorious hue, drop in the butter. Stir vigorously until the butter melts and everything is silky. Now comes the fun part—slowly pour in a cup of heavy cream. The caramel will bubble up like a science experiment, so just keep stirring! Finish with your sea salt and set it aside; you’ve just made liquid gold.
Step 3: Prepare the Custard Base
In a new saucepan, gently heat the remaining cup of heavy cream with the whole milk and fragrant vanilla extract. You don’t want to boil, just to steam and coax out the flavors. This blend ensures your Homemade Salted Caramel Ice Cream will be wonderfully creamy and rich.
Step 4: Temper the Eggs
In a medium bowl, whisk your egg yolks. Here’s a chef’s trick: carefully ladle about half a cup of your warmed dairy mixture into the yolks, whisking all the while so nothing scrambles. This gradually brings the temperature up—a process called tempering—so your custard will be smooth instead of lumpy.
Step 5: Thicken the Custard
Pour the tempered egg mixture back into the saucepan with the rest of the warm milk blend. Over medium-low heat, stir constantly and patiently. Watch carefully until the custard thickens just enough to coat the back of a spoon (170–175°F). This makes the base of your Homemade Salted Caramel Ice Cream extra luxurious.
Step 6: Combine with Caramel
Take the custard off the heat and stir in all of your prepared caramel sauce. This is where the magic really happens! Mix until it’s completely smooth and unified, with no streaks left behind—now, you’re looking at one pretty incredible ice cream base.
Step 7: Strain and Chill
To guarantee that ultra-smooth finish, pour the mixture through a fine mesh strainer into a clean bowl. Let it come to room temperature, then tuck it into your refrigerator for at least 4 hours (overnight is even better!) so the flavors meld and the base is well-chilled for churning.
Step 8: Churn and Freeze
Once chilled, pour the mixture into your ice cream maker and churn according to the manufacturer’s instructions. As you watch it transform from liquid to luxuriously thick ice cream, you’ll know something special is about to emerge. Transfer it to a container and freeze for another 4 hours to allow it to set perfectly.
How to Serve Homemade Salted Caramel Ice Cream
Garnishes
Dress up your scoops with a playful drizzle of extra caramel sauce, a sprinkle of flaky sea salt, or perhaps a handful of chopped salted toffee pieces for a little crunch. These simple touches not only look beautiful but also amplify the flavors, making every serving of Homemade Salted Caramel Ice Cream a mini celebration.
Side Dishes
While this ice cream is absolutely amazing on its own, it pairs delightfully with crisp butter cookies, slices of warm brownie, or tucked between homemade chocolate chip cookies for next-level ice cream sandwiches. Each option brings a new layer of enjoyment and, trust me, turns your dessert course into an absolute event.
Creative Ways to Present
Hosting a dinner or looking for a show-stopping touch? Try serving your Homemade Salted Caramel Ice Cream in vintage coupe glasses with spun sugar decoration, or layer it in a sundae with roasted nuts and whipped cream. For the kids (and the young at heart), waffle cones or edible cookie cups are guaranteed crowd-pleasers.
Make Ahead and Storage
Storing Leftovers
Homemade Salted Caramel Ice Cream is easy to store—simply transfer any leftovers to an airtight container. Press a piece of parchment directly onto the surface before sealing the lid to keep it ultra-fresh and prevent ice crystals. Stored this way, your delicious creation will stay scoopable and just as luscious for up to two weeks.
Freezing
For the smoothest texture, store the ice cream in the coldest part of your freezer and avoid frequent temperature changes. If you want to swirl in extra caramel or add any mix-ins, gently fold them in just before the final freeze. This keeps your ice cream rich, creamy, and bursting with caramel flavor every time.
Reheating
No need to reheat, but if your ice cream becomes too hard to scoop, let the container rest on the counter for 5–10 minutes. This quick rest brings it to that perfect, creamy consistency—ready to delight! Never use a microwave or hot water, as they can melt and compromise the texture.
FAQs
Can I make Homemade Salted Caramel Ice Cream without an ice cream maker?
Absolutely! While churning gives the creamiest texture, you can mimic the effect by freezing the custard mixture and stirring every 30 minutes for a few hours. The result won’t be quite as smooth, but it’s still fantastically flavorful.
What kind of sea salt works best?
Fleur de sel or Maldon salt are wonderful choices because their delicate flakes both dissolve evenly and add a pretty, crave-worthy crunch when sprinkled on top. Avoid table salt, which can be harsh and overpowering.
How do I avoid grainy caramel?
Always melt the sugar slowly and stir gently so it doesn’t crystallize. If it looks lumpy or gritty, keep stirring—those lumps usually smooth out as the sugar melts. Using a heavy-bottomed pan also helps ensure even heating.
Can I double the recipe?
Yes, you can double everything, but be sure your saucepan and ice cream maker can handle the extra volume. When doubling, caramel can take a bit longer to cook, so watch the color closely.
Is Homemade Salted Caramel Ice Cream gluten-free?
The base recipe is naturally gluten-free, as none of the ingredients contain gluten. Just be cautious with any mix-ins or garnishes, as some cookies or candies may contain wheat.
Final Thoughts
There’s nothing quite like offering friends and family a dish of Homemade Salted Caramel Ice Cream that you crafted with your own hands—it’s a sweet labor of love that always gets rave reviews. Don’t be surprised if this recipe becomes your signature treat, and remember, every scoop you serve is a little moment of pure joy. Give it a try and enjoy the creamy, salty-sweet magic!
Print
Homemade Salted Caramel Ice Cream Recipe
- Total Time: 6 hours
- Yield: 1 quart 1x
- Diet: Vegetarian
Description
Indulge in the rich and creamy goodness of Homemade Salted Caramel Ice Cream. This decadent dessert features a luscious caramel base swirled with a hint of sea salt, creating a perfect balance of sweet and salty flavors.
Ingredients
Caramel Sauce:
- 1 cup granulated sugar
- 6 tablespoons unsalted butter (cut into pieces)
- 1/2 teaspoon sea salt
- 1 cup heavy cream (divided)
Ice Cream Base:
- 2 cups heavy cream
- 1 cup whole milk
- 1 teaspoon vanilla extract
- 5 large egg yolks
Instructions
- Caramel Sauce: In a saucepan, melt granulated sugar until amber. Add butter, stir, then pour in 1 cup of heavy cream and salt. Set aside.
- Ice Cream Base: Heat remaining cream, milk, and vanilla. Whisk egg yolks, temper with milk, then cook until thick. Mix in caramel sauce. Strain and chill.
- Churning: Process in ice cream maker, freeze before serving.
Notes
- For added texture, swirl in extra caramel sauce or chopped salted toffee pieces before freezing.
- Store in an airtight container for up to 2 weeks.
- Prep Time: 30 minutes
- Cook Time: 20 minutes
- Category: Dessert
- Method: Churning
- Cuisine: American
Nutrition
- Serving Size: 1/2 cup
- Calories: 330
- Sugar: 26 g
- Sodium: 190 mg
- Fat: 24 g
- Saturated Fat: 14 g
- Unsaturated Fat: 8 g
- Trans Fat: 0 g
- Carbohydrates: 28 g
- Fiber: 0 g
- Protein: 4 g
- Cholesterol: 140 mg
