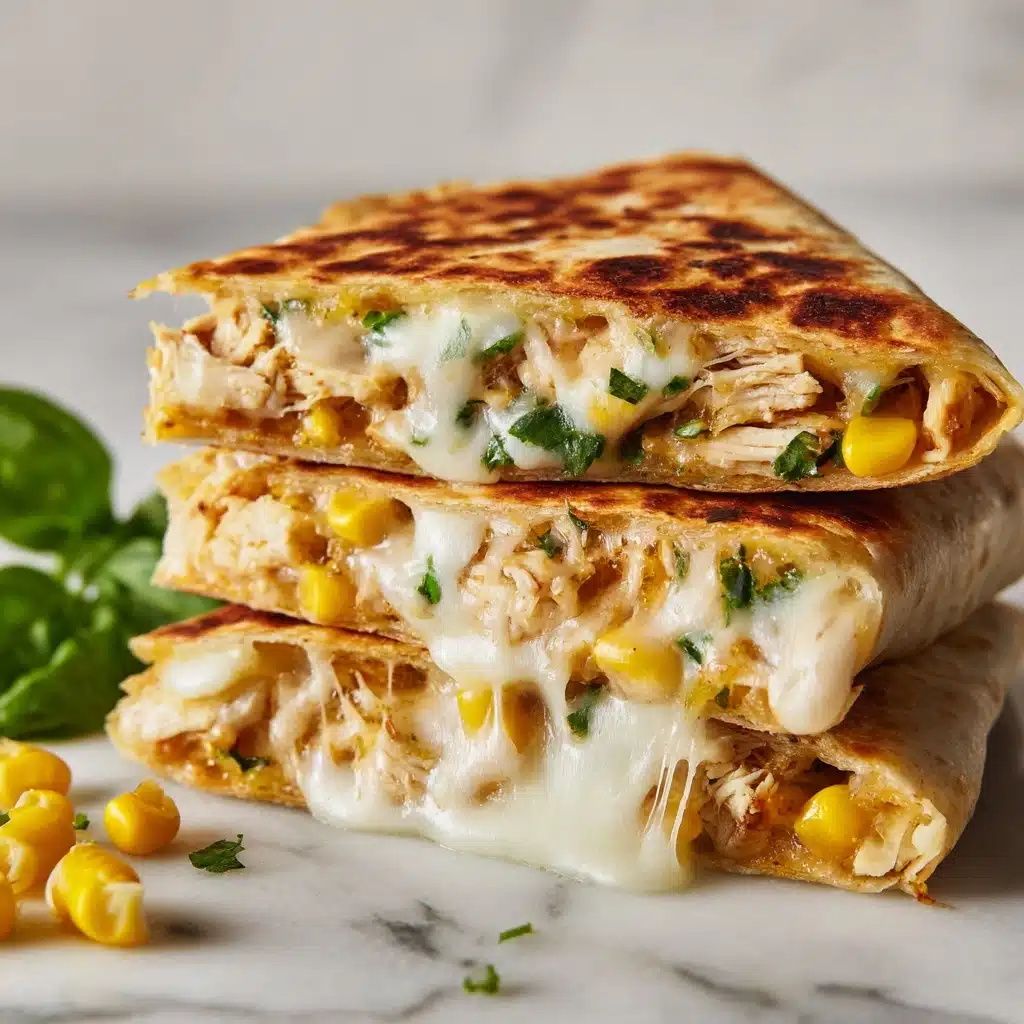
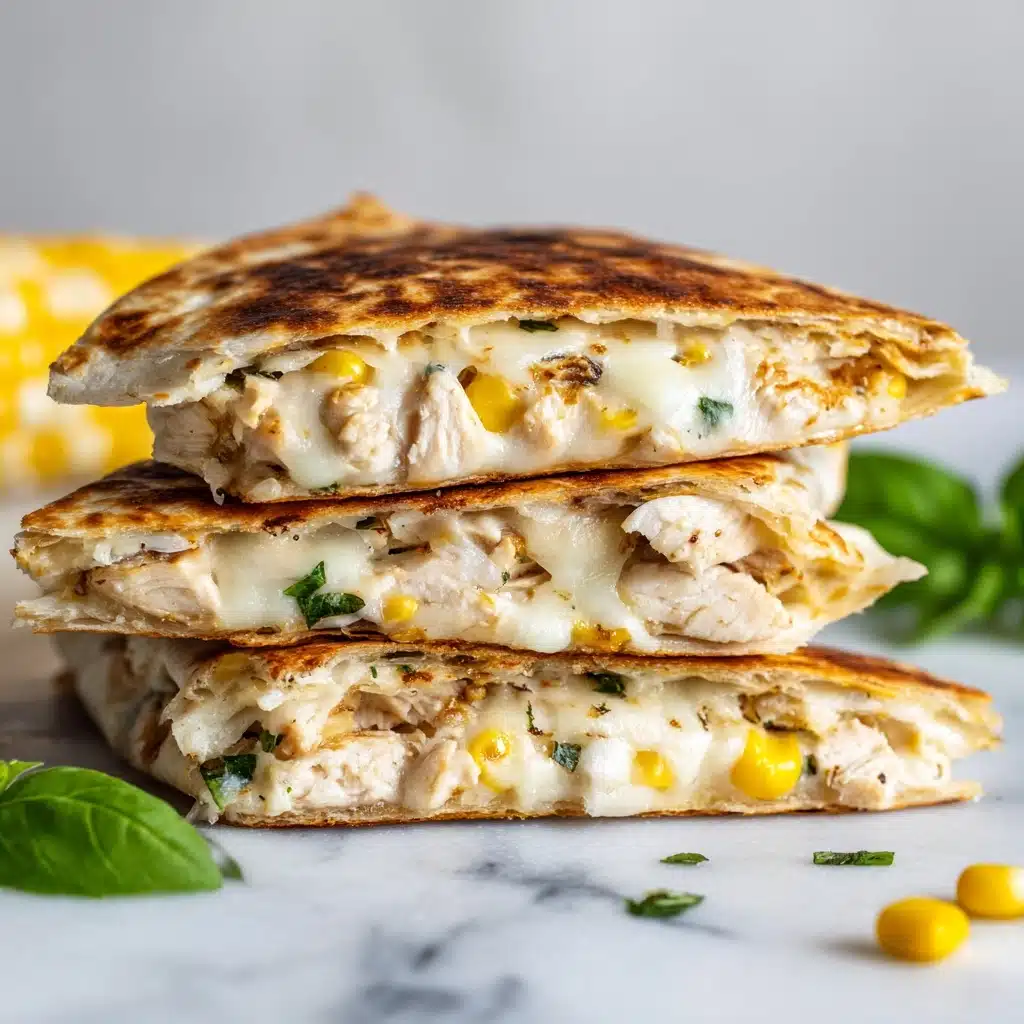
Get ready to fall in love with melt-in-your-mouth flavor and oozy, gooey cheese! This Cheesy Garlic Chicken Wraps Recipe is everything you crave in a comfort-food meal, rolled up into one toasty, irresistible package. Succulent strips of seasoned chicken get partnered with three kinds of creamy, stretchy cheese, then tucked into a soft tortilla and browned until perfectly crisp. It’s a quick and soul-satisfying dish that will have everyone at your table asking for seconds. Whether you need a weeknight dinner win or a portable lunch idea, this wrap is guaranteed to become one of your go-tos!
Ingredients You’ll Need
The best part about this Cheesy Garlic Chicken Wraps Recipe is that the ingredient list is delightfully simple, but every item pulls its weight. From the juicy chicken to the zesty garlic and that glorious trio of cheeses, each addition brings flavor, depth, and the kind of comfort that wraps you up like a hug.
- Chicken breasts: Cut into strips for quick, even cooking and plenty of meaty bite in every wrap.
- Olive oil: Gives the chicken a golden sizzle and keeps everything juicy.
- Garlic powder: Infuses the chicken with a warm, savory undertone without being overpowering.
- Fresh garlic: Minced garlic adds a delightful pop of real-deal garlicky goodness at the end.
- Salt: Makes all the flavors in the cheesy filling sing.
- Black pepper: Brings boldness and a gentle heat that balances the richness of the cheese.
- Paprika: Adds color and a subtle smokiness that complements the chicken beautifully.
- Onion powder: Rounds out the seasoning with a little extra zip.
- Mozzarella cheese: The ultimate melter; gives you that irresistible stretch in every bite.
- Cheddar cheese: Punches up the cheesy flavor with a touch of sharpness.
- Cream cheese: Makes the filling ultra-creamy and helps bind everything together.
- Flour tortillas: The perfect vessel to bundle up all that goodness—soft, warm, and oh-so-toasty when browned.
- Butter: Melted and brushed on the wraps for an unforgettable golden crunch.
- Chopped parsley (optional): Lends a fresh pop of color and a touch of herbiness at the end.
How to Make Cheesy Garlic Chicken Wraps Recipe
Step 1: Season and Sauté the Chicken
Begin by heating olive oil in a skillet over medium heat. Add the sliced chicken strips straight to the pan, then shower them with salt, pepper, garlic powder, onion powder, and paprika. Let the chicken cook for 6 to 8 minutes, stirring occasionally, until each piece turns perfectly golden and is completely cooked through. In the final minute, add the minced fresh garlic and let it sizzle—this transforms the kitchen with an irresistible aroma and ensures the garlic flavor is vivid but not burnt.
Step 2: Mix Up the Cheesy Filling
Take the skillet off the heat. In a large bowl, combine your hot cooked chicken with the softened cream cheese, shredded mozzarella, and cheddar. Using a large spoon or spatula, mix until all the cheese melts and blends with the chicken, forming a rich, irresistible filling that holds together with creamy, gooey strands.
Step 3: Fill and Wrap the Tortillas
Lay out your tortillas on a flat surface. Divide the cheesy chicken mixture evenly between them, piling it in a line down the center of each one. Fold in the sides and roll each tortilla up tightly, making sure the filling stays snug inside for that perfect, portable wrap.
Step 4: Toast for Golden Crunch
Brush the outsides of each wrap generously with melted butter—this is the secret to that magical golden crust. Heat a non-stick skillet over medium heat and place the wraps seam-side down. Toast for 2 to 3 minutes per side, pressing gently with a spatula, until each wrap is beautifully crisp and golden all the way around.
Step 5: Slice, Garnish, and Serve
Transfer your Cheesy Garlic Chicken Wraps to a cutting board, slice them in half for easy eating, and sprinkle with chopped parsley if you’re feeling fancy. Serve them while they’re still warm and melty for the ultimate experience—trust me, they’ll disappear fast!
How to Serve Cheesy Garlic Chicken Wraps Recipe
Garnishes
A simple sprinkle of chopped fresh parsley does wonders to brighten up your wraps, but you could get creative and add a light dusting of smoked paprika or a handful of sliced green onions. For a little extra zip, try a quick drizzle of your favorite hot sauce or a squeeze of fresh lemon—each garnish brings a bit of personality to the plate.
Side Dishes
While these wraps are stars on their own, they’re even better alongside crisp veggie sticks, a tangy slaw, or roasted sweet potato wedges. If you’re a dip lover, serve with garlic sauce, ranch, or even a punchy salsa for dunking—it’s the perfect excuse to get a little saucy!
Creative Ways to Present
For parties or family movie night, slice each wrap into bite-size pinwheels and spear them with toothpicks for easy snacking. If you want a hearty meal, tuck the wraps into a basket lined with parchment and add a side of pickles or chips for that classic deli vibe. Or lay out a wrap bar, letting everyone add their own favorite toppings and wraps right at the table!
Make Ahead and Storage
Storing Leftovers
If you end up with extra Cheesy Garlic Chicken Wraps, simply let them cool completely, then wrap each one tightly in foil or plastic wrap. Store in an airtight container in the fridge, where they’ll stay delicious for up to three days. This makes them a lifesaver for next-day lunches!
Freezing
Want to keep some on hand for super busy days? These wraps actually freeze beautifully. Just wrap each cooled wrap tightly in plastic wrap, then foil, and pop them in a zip-top bag. They’ll keep in the freezer for up to two months. When you need a grab-and-go meal, just thaw overnight in the fridge.
Reheating
To recapture that glorious crispy exterior, the best way to reheat your Cheesy Garlic Chicken Wraps is in a skillet over medium heat—toast for a couple minutes per side. If you’re in a hurry, a quick trip through the microwave works, but for the ultimate crunch, the oven or air fryer is your friend!
FAQs
Can I use rotisserie or leftover chicken for this Cheesy Garlic Chicken Wraps Recipe?
Absolutely! Shred rotisserie or leftover cooked chicken, toss it with the seasonings and cheeses, and follow the rest of the recipe. It’s a fantastic shortcut on busy days and still tastes fantastic.
Are these wraps spicy?
The recipe as written is mild, with just enough kick from black pepper and paprika for balance. If you prefer heat, feel free to add a pinch of cayenne or your favorite hot sauce to the chicken mixture before wrapping.
What can I add to make it more nutritious?
You can sneak veggies right into the filling! Try chopped spinach, sautéed bell peppers, or even a handful of corn or black beans—they blend right in and add extra color, crunch, and nutrition.
Can I make this Cheesy Garlic Chicken Wraps Recipe gluten-free?
Yes, simply swap in your favorite gluten-free tortillas. Double-check your other ingredient labels to make sure they’re gluten-free, and you’re good to go!
Should I serve the wraps warm or cold?
These wraps truly shine when served warm and melty from the skillet, but they’re also tasty at room temperature. If you’re packing them for lunch, you can wrap them in foil to help retain heat, or enjoy them as a cold, cheesy treat.
Final Thoughts
Don’t be surprised if this Cheesy Garlic Chicken Wraps Recipe becomes a regular in your kitchen—it’s just that satisfying, easy, and adaptable. Whether you’re feeding picky eaters or spice lovers, these wraps bring everyone to the table with big flavor and plenty of cheesy goodness. Give them a try, and let yourself savor every golden, garlicky, cheesy bite!
Print
Cheesy Garlic Chicken Wraps Recipe
- Total Time: 25 minutes
- Yield: 4 wraps 1x
- Diet: Non-Vegetarian
Description
These Cheesy Garlic Chicken Wraps are a delicious and easy-to-make meal that the whole family will love. Tender chicken strips seasoned with garlic and spices, combined with a creamy, cheesy mixture, all wrapped up in a warm tortilla and toasted to perfection.
Ingredients
Chicken:
- 2 large boneless skinless chicken breasts (sliced into strips)
- 1 tablespoon olive oil
- 1 teaspoon garlic powder
- 2 cloves garlic (minced)
- 1/2 teaspoon salt
- 1/2 teaspoon black pepper
- 1/2 teaspoon paprika
- 1/2 teaspoon onion powder
Cheese Mixture:
- 1 cup shredded mozzarella cheese
- 1/2 cup shredded cheddar cheese
- 1/4 cup cream cheese (softened)
Wraps:
- 4 large flour tortillas
- 2 tablespoons butter (melted)
- Chopped parsley for garnish (optional)
Instructions
- Cook Chicken: Heat olive oil in a skillet, add chicken strips, season with salt, pepper, garlic powder, onion powder, and paprika. Cook until golden, then add minced garlic.
- Combine Ingredients: In a bowl, mix cooked chicken with cream cheese, mozzarella, and cheddar.
- Assemble Wraps: Divide the cheesy chicken mixture among tortillas, roll tightly, brush with melted butter.
- Toast Wraps: Toast in a skillet until golden brown and crisp on both sides.
- Serve: Slice wraps, garnish with parsley, and enjoy warm.
Notes
- Add chopped spinach or bell peppers for extra veggies.
- Use whole wheat or low-carb tortillas if preferred.
- Great with ranch or garlic dipping sauce.
- Prep Time: 10 minutes
- Cook Time: 15 minutes
- Category: Main Course
- Method: Stovetop
- Cuisine: American
Nutrition
- Serving Size: 1 wrap
- Calories: 470
- Sugar: 2g
- Sodium: 620mg
- Fat: 26g
- Saturated Fat: 12g
- Unsaturated Fat: 11g
- Trans Fat: 0.2g
- Carbohydrates: 30g
- Fiber: 2g
- Protein: 32g
- Cholesterol: 95mg


