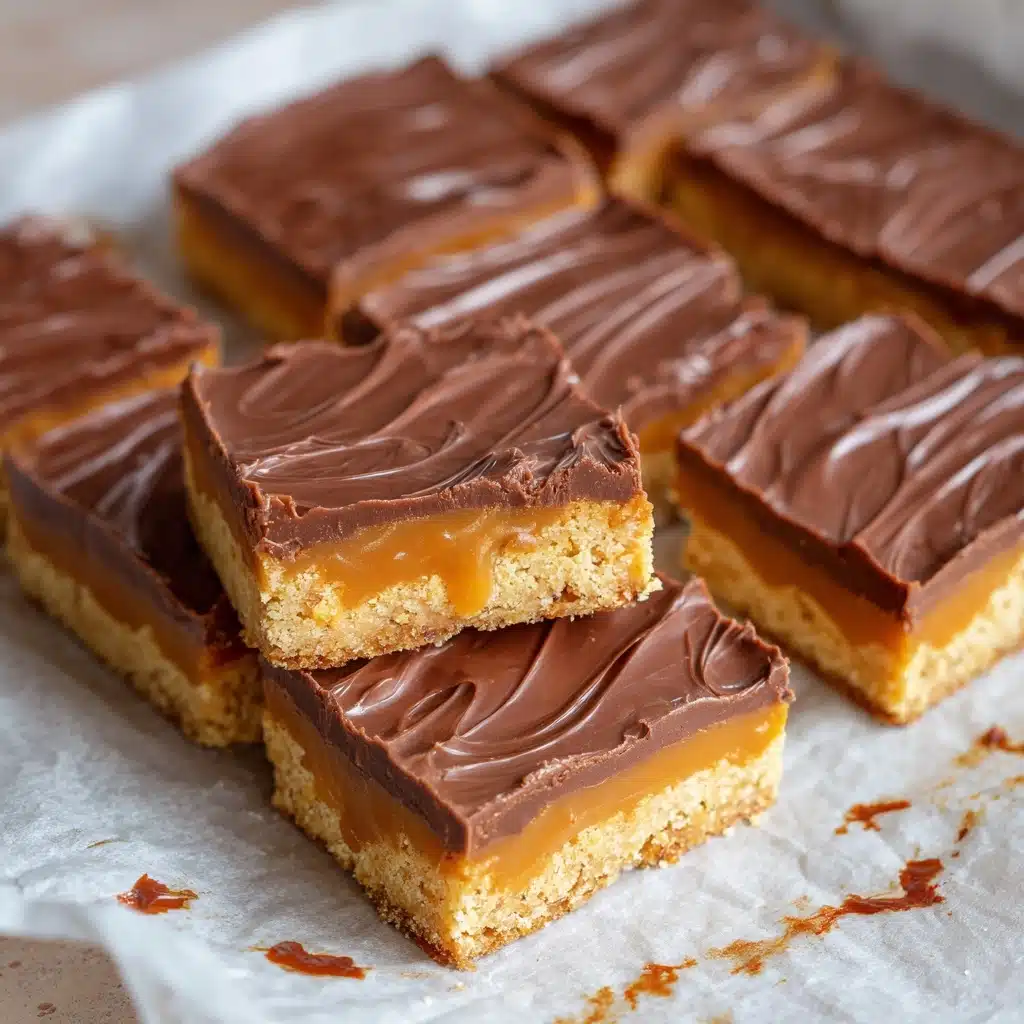
If you love the classic candy bar but want something extra special, these Homemade Twix Bars will absolutely blow you away. Imagine buttery, crumbly shortbread layered with rich, gooey caramel and topped off with a silky coat of chocolate—every bite is pure bliss! Making these bars from scratch is easier than you think, and the result is a treat that’s so much fresher and more luxurious than anything you’ll find in a wrapper. Whether you’re baking for a party or just treating yourself, this recipe brings all the nostalgia and flavor of your favorite childhood candy, but with a homemade twist.

Ingredients You’ll Need
One of the best things about Homemade Twix Bars is just how simple the ingredient list is. Each component plays a crucial role, from the buttery shortbread to the lush caramel and decadent chocolate topping. Here’s what you’ll need, plus a few tips for best results:
- All-purpose flour: The foundation for a tender, crumbly shortbread base that holds everything together.
- Granulated sugar: Adds just enough sweetness to balance the buttery richness of the crust.
- Unsalted butter (softened): Essential for both the shortbread and caramel, giving a melt-in-your-mouth texture and rich flavor.
- Sweetened condensed milk: The magic ingredient for creamy, dreamy caramel that sets perfectly atop the shortbread.
- Brown sugar (packed): Deepens the caramel flavor with notes of toffee and molasses.
- Light corn syrup: Prevents the caramel from crystallizing, ensuring a silky-smooth middle layer.
- Vanilla extract: Adds warmth and complexity to the caramel layer.
- Milk chocolate chips (or dark chocolate): For that signature chocolate coating; feel free to swap in dark chocolate for a more grown-up treat.
- Vegetable oil: Helps the chocolate melt to a glossy, pourable consistency that sets beautifully.
How to Make Homemade Twix Bars
Step 1: Prepare the Shortbread
First, preheat your oven to 350°F (175°C) and line an 8×8-inch baking pan with parchment paper, making sure there’s extra hanging off the sides. This will make it a breeze to lift the bars out later for slicing—trust me, this little step makes all the difference!
Step 2: Make the Shortbread Base
In a mixing bowl, combine the all-purpose flour, granulated sugar, and softened butter. Use a fork, pastry cutter, or your hands to work the mixture until it’s crumbly and well combined. Don’t overmix; you want it to just come together. Press this dough firmly into your prepared pan, smoothing it out for an even layer. Bake for 15-18 minutes, until the edges are just turning golden. Allow the shortbread to cool completely before moving on—this keeps the layers distinct and prevents a soggy base.
Step 3: Prepare the Caramel Layer
While the shortbread is cooling, get started on the caramel. In a medium saucepan, combine the sweetened condensed milk, packed brown sugar, butter, and corn syrup. Set over medium heat and stir constantly—don’t walk away, this caramel needs your attention! In about 8-10 minutes, the mixture will thicken to a luscious, golden caramel. Remove from the heat and stir in the vanilla extract, which adds that perfect finishing touch.
Step 4: Add Caramel Layer
Pour the hot caramel evenly over your cooled shortbread base. Use a spatula to spread it to the edges, then let it set at room temperature for 20-30 minutes. This step is all about patience—the caramel needs time to firm up so the chocolate layer will sit perfectly on top.
Step 5: Melt the Chocolate
In a microwave-safe bowl, combine the chocolate chips and vegetable oil. Microwave in 20-second bursts, stirring well after each, until the chocolate is silky smooth and glossy. The oil helps create that classic sheen and makes the chocolate easier to slice once set.
Step 6: Add Chocolate Layer
Pour the melted chocolate over the caramel layer, using a spatula or the back of a spoon to spread it out evenly. Let the pan sit at room temperature, or pop it in the fridge if you’re feeling impatient, until the chocolate is completely firm. This is the final step before enjoying your Homemade Twix Bars!
Step 7: Slice and Serve
Once the bars are set, grab those parchment paper edges and lift the whole slab out of the pan. Use a sharp knife to slice into bars or squares—whatever shape speaks to you! Each cut reveals those gorgeous layers, and you can finally reward yourself with a taste of homemade candy perfection.
How to Serve Homemade Twix Bars
Garnishes
For a little extra flair, sprinkle a pinch of flaky sea salt over the chocolate before it sets. This not only looks beautiful but also adds a pop of flavor that highlights the rich caramel. You could also drizzle with a contrasting chocolate (white or dark) for a bakery-style finish.
Side Dishes
These bars are delicious on their own, but if you want to turn dessert into a full celebration, try serving them alongside a scoop of vanilla ice cream or a dollop of whipped cream. The cool, creamy sides balance the sweet, crunchy Homemade Twix Bars perfectly.
Creative Ways to Present
Stack the bars on a pretty platter for a party, wrap them individually in wax paper for lunchbox treats, or package them in a gift box tied with ribbon for a homemade gift. However you serve them, these bars are guaranteed to impress!
Make Ahead and Storage
Storing Leftovers
Homemade Twix Bars keep beautifully! Store any leftovers in an airtight container at room temperature for up to 1 week. If your kitchen runs warm, you might want to keep them in the fridge to prevent the chocolate from getting too soft.
Freezing
Yes, you can freeze these bars! Place them in a single layer in a freezer-safe container, separating layers with parchment paper. They’ll keep for up to 2 months. Thaw at room temperature before serving for the best texture.
Reheating
While Homemade Twix Bars are meant to be enjoyed at room temperature or chilled, if you want a gooier experience, pop a bar in the microwave for just 5-10 seconds. It’ll soften the caramel and make the chocolate slightly melty—absolutely decadent!
FAQs
Can I use dark chocolate instead of milk chocolate?
Absolutely! Dark chocolate brings a slightly more sophisticated flavor and balances the sweetness of the caramel. Just swap it in at a 1:1 ratio for the milk chocolate chips.
What can I use instead of corn syrup?
If you prefer not to use corn syrup, you can substitute with golden syrup or even honey. The texture may be slightly different, but your caramel will still be delicious and smooth.
How do I cut the bars cleanly?
For neat, bakery-worthy Homemade Twix Bars, use a sharp knife dipped in hot water and wiped dry between cuts. This helps the blade glide through the chocolate and caramel layers without cracking or sticking.
Can I double this recipe?
Yes! Just use a 9×13-inch pan and double all the ingredients. The bars may need a few extra minutes to bake and set, but you’ll have plenty to share—or stash away for yourself!
Are these bars gluten-free?
As written, the recipe uses all-purpose flour, which contains gluten. For a gluten-free version, substitute with your favorite 1:1 gluten-free baking blend. The results are still wonderfully crisp and delicious.
Final Thoughts
If you’re looking for a show-stopping treat that’s as fun to make as it is to eat, you can’t go wrong with Homemade Twix Bars. They’re the perfect blend of nostalgic comfort and homemade magic—so gather your ingredients and give them a try. You just might find a new favorite to share (or keep all to yourself)!
Print
Homemade Twix Bars Recipe
- Total Time: 1 hour 30 minutes
- Yield: 16 bars 1x
- Diet: Vegetarian
Description
Homemade Twix Bars combine a buttery shortbread base, a rich caramel layer, and a smooth chocolate topping to recreate the classic candy bar in a delightful homemade version. Perfect for a sweet treat or dessert, these bars are easy to make and share.
Ingredients
Shortbread Base
- 1 cup all-purpose flour
- 1/4 cup granulated sugar
- 1/2 cup unsalted butter, softened
Caramel Layer
- 1/2 cup sweetened condensed milk
- 1/2 cup brown sugar, packed
- 1/4 cup unsalted butter
- 2 tablespoons light corn syrup
- 1/2 teaspoon vanilla extract
Chocolate Topping
- 1 1/2 cups milk chocolate chips (or dark chocolate, if preferred)
- 1 teaspoon vegetable oil
Instructions
- Prepare the Shortbread: Preheat your oven to 350°F (175°C) and line an 8×8-inch baking pan with parchment paper, allowing extra overhang for easy removal.
- Make the Shortbread Base: In a mixing bowl, combine the all-purpose flour, granulated sugar, and softened unsalted butter until a crumbly dough forms. Press the dough evenly into the prepared pan. Bake for 15-18 minutes until the edges are lightly golden. Remove from oven and let cool completely.
- Prepare the Caramel Layer: In a saucepan over medium heat, combine sweetened condensed milk, brown sugar, unsalted butter, and light corn syrup. Stir constantly for 8-10 minutes until the mixture thickens and turns golden. Remove from heat and stir in vanilla extract.
- Add Caramel Layer: Pour the warm caramel evenly over the cooled shortbread base and spread with a spatula. Allow it to set for 20-30 minutes until firm.
- Melt the Chocolate: Place milk chocolate chips and vegetable oil in a microwave-safe bowl. Microwave in 20-second intervals, stirring in between, until the chocolate is melted and glossy smooth.
- Add Chocolate Layer: Pour the melted chocolate over the set caramel layer and spread evenly. Let the bars set at room temperature or refrigerate until the chocolate is firm.
- Slice and Serve: Once fully set, use the parchment paper overhang to lift the bars out of the pan. Slice into 16 bars and enjoy your homemade Twix bars!
Notes
- Use parchment paper to easily remove the bars from the pan without breaking.
- For a darker chocolate flavor, substitute milk chocolate chips with dark chocolate chips.
- Store bars in an airtight container at room temperature for up to 3 days or refrigerate up to a week.
- Microwave chocolate carefully in short bursts to avoid burning.
- Allow caramel to completely set before adding chocolate to prevent mixing layers.
- Prep Time: 20 minutes
- Cook Time: 25 minutes
- Category: Dessert, Snack
- Method: Baking, Stovetop cooking, Melting
- Cuisine: American
Nutrition
- Serving Size: 1 bar (about 50g)
- Calories: 260 kcal
- Sugar: 20 g
- Sodium: 90 mg
- Fat: 15 g
- Saturated Fat: 9 g
- Unsaturated Fat: 5 g
- Trans Fat: 0.2 g
- Carbohydrates: 30 g
- Fiber: 1 g
- Protein: 2 g
- Cholesterol: 25 mg


