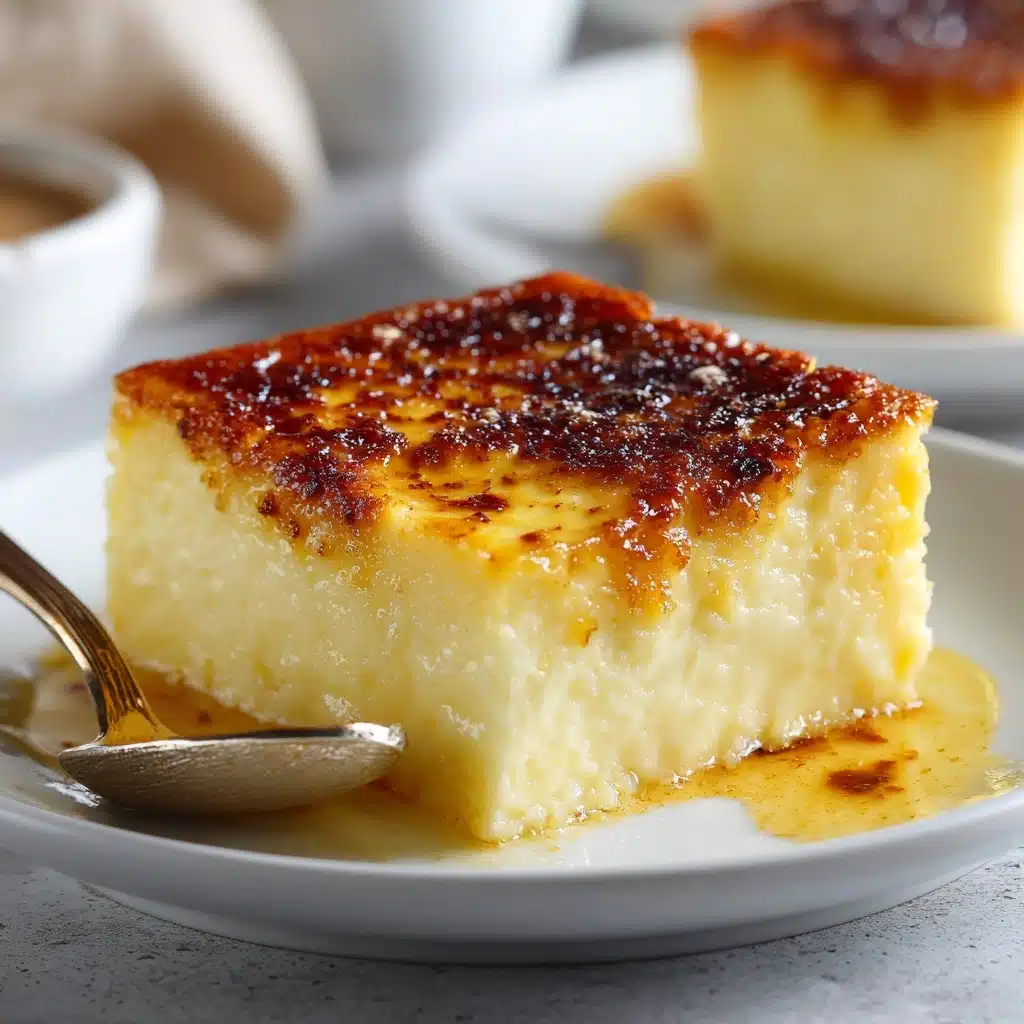
If you’re searching for the kind of classic comfort dessert that’s equal parts simple and elegant, you’re going to fall for this Fail-Proof Egg Custard. Silky, creamy, and gently sweet, this custard is my go-to anytime I want to impress guests or just treat myself to something special. Every spoonful feels like a warm hug—soothing, nostalgic, and never intimidating to make. The best part? With this method, you’re guaranteed the dreamy texture of a perfect custard, every single time.
Ingredients You’ll Need
You only need a handful of pantry staples to create this luscious Fail-Proof Egg Custard, but each ingredient makes a real difference. Simple, high-quality components are what let the flavors and texture shine—so don’t skimp on the details!
- Whole milk: Provides the custard’s creamy backbone and rich mouthfeel—use whole milk for best results.
- Large eggs: The star players that transform the mixture into a set custard, giving structure and that iconic silky finish.
- Granulated sugar: Adds just the right amount of sweetness without overpowering the natural flavors.
- Pure vanilla extract: Rounds out the flavor with warmth and depth; real vanilla makes all the difference.
- Salt: A pinch sharpens the flavors and prevents the custard from tasting flat.
- Ground nutmeg (optional): A sprinkling on top adds a classic aroma and a hint of spice—totally optional, but highly recommended.
How to Make Fail-Proof Egg Custard
Step 1: Preheat and Warm the Milk
Start by preheating your oven to 325°F (160°C). While the oven heats, pour the whole milk into a medium saucepan and warm it over medium heat. You’re aiming for the milk to be just hot to the touch—never boiling. This gentle warming helps the sugar dissolve easily and makes the custard smooth, not scrambled.
Step 2: Whisk the Egg Mixture
In a mixing bowl, combine the eggs, granulated sugar, vanilla extract, and salt. Whisk everything together until the mixture looks pale and perfectly blended. This step is your secret to a custard that bakes up light and creamy, so take your time with it!
Step 3: Combine Milk and Eggs Carefully
Now, here’s where the magic happens. Slowly pour the warm milk into the egg mixture, whisking constantly. This “tempering” prevents the eggs from cooking too quickly and ensures your Fail-Proof Egg Custard comes out silky and smooth. Don’t rush—steady whisking makes all the difference!
Step 4: Strain for Silkiness
For the ultimate creamy texture, pour the custard mixture through a fine mesh sieve into a large measuring cup or bowl. This catches any stray bits of egg, guaranteeing that your custard is perfectly smooth. It’s a tiny step that delivers a huge payoff in the final result.
Step 5: Pour and Prepare the Water Bath
Divide the custard evenly among six 6-ounce ramekins. Place the ramekins in a large baking dish, then carefully pour hot water into the dish until it reaches about halfway up the sides of the ramekins. This water bath helps the custard bake gently and evenly, preventing cracks or rubbery spots.
Step 6: Bake and Cool
Slide the baking dish into your oven and bake for 40 to 45 minutes. You’ll know your Fail-Proof Egg Custard is ready when a knife inserted near the center comes out clean but the custard still jiggles slightly. Remove from the water bath and let the ramekins cool before refrigerating for at least 2 hours to set. Sprinkle with ground nutmeg just before serving, if you like.
How to Serve Fail-Proof Egg Custard

Garnishes
A dusting of ground nutmeg is the classic finish for egg custard—its gentle spice pairs beautifully with the creamy base. If you’re feeling adventurous, try a tiny swirl of whipped cream, a few fresh berries, or even a drizzle of honey for extra flair.
Side Dishes
This custard stands beautifully on its own, but it also pairs well with a crisp butter cookie or a handful of sliced seasonal fruit. The lightness of Fail-Proof Egg Custard balances out richer desserts on a sweets platter, making it a welcome addition to any dessert table.
Creative Ways to Present
For a special touch, serve the custard in vintage teacups, espresso cups, or even tiny glass jars. Mini portions are charming for parties, and you can top each one with a sprinkle of toasted coconut, a shard of caramel, or a twist of citrus zest to match the occasion.
Make Ahead and Storage
Storing Leftovers
Cover any leftover Fail-Proof Egg Custard tightly with plastic wrap and keep it in the refrigerator. It will stay fresh and luscious for up to three days, making it a perfect make-ahead dessert for busy weeks or unexpected guests.
Freezing
While technically you can freeze egg custard, the texture may change and become a bit watery once thawed. For best results, enjoy Fail-Proof Egg Custard fresh from the fridge, but if you must freeze, wrap the ramekins tightly and consume within a month.
Reheating
To gently warm your custard, set the ramekin in a pan of hot water for a few minutes, or microwave in 10-second bursts until just warmed through. Be careful not to overheat, as this can cause the custard to curdle or become rubbery.
FAQs
Why did my custard turn out grainy?
A grainy texture usually means the eggs cooked too quickly or at too high a temperature. Always combine your warm milk with eggs slowly, whisking constantly, and bake your Fail-Proof Egg Custard in a water bath to ensure even, gentle heat.
Can I use low-fat or non-dairy milk instead of whole milk?
Whole milk delivers the creamiest results, but you can experiment with 2 percent milk for a lighter custard. Non-dairy milks will work, but expect a slightly different texture and flavor—some plant milks may not set quite as firmly as dairy.
How do I know when the custard is done baking?
Your Fail-Proof Egg Custard is done when a knife inserted near the center comes out clean but the custard still has a slight jiggle. Overbaking can cause cracks or a tough texture, so keep a close eye during the last 5 minutes of baking.
Can I add different flavors to the custard?
Absolutely! Infuse the milk with cinnamon sticks, citrus zest, or even a splash of almond extract before combining with the eggs. Just be sure to strain the mixture for a velvety finish.
Do I have to use ramekins?
Ramekins are classic, but any oven-safe small dish will work. You can even bake the Fail-Proof Egg Custard as one large dish—just adjust the baking time and check for doneness in the center.
Final Thoughts
If you’ve ever wished for a dessert that’s both timeless and entirely foolproof, this Fail-Proof Egg Custard is the one to try. It’s gently sweet, endlessly adaptable, and always impressive—whether you’re cooking for family or friends, or just craving a cozy treat for yourself. I hope it becomes as much a staple in your kitchen as it is in mine!
Print
Fail-Proof Egg Custard Recipe
- Total Time: 1 hour
- Yield: 6 servings 1x
- Diet: Vegetarian
Description
This fail-proof egg custard recipe delivers a smooth, creamy dessert that’s easy to make and perfect for any occasion. Baked gently in a water bath to ensure a silky texture, this classic American custard is naturally gluten-free and nut-free, making it a safe and delicious treat for many dietary needs.
Ingredients
Custard Base
- 2 cups whole milk
- 4 large eggs
- 1/2 cup granulated sugar
- 1 teaspoon pure vanilla extract
- 1/4 teaspoon salt
For Serving (Optional)
- Ground nutmeg for topping
Instructions
- Preheat Oven: Preheat your oven to 325°F (160°C) to prepare for baking the custard evenly.
- Warm Milk: In a medium saucepan, heat the milk over medium heat just until warm, making sure it doesn’t boil to prevent curdling in the next steps.
- Whisk Eggs and Sweetener: In a mixing bowl, whisk together the eggs, granulated sugar, vanilla extract, and salt until the mixture is smooth and consistent.
- Combine Mixtures: Slowly pour the warm milk into the egg mixture while whisking constantly to keep the eggs from cooking prematurely and to create a uniform custard base.
- Strain Custard: Pour the custard mixture through a fine mesh sieve into a large measuring cup or bowl to remove any lumps for a silkier texture.
- Fill Ramekins: Evenly distribute the custard mixture into six 6-ounce ramekins, ensuring each is filled to the same level.
- Prepare Water Bath: Place the ramekins in a large baking dish and carefully pour hot water into the dish until it comes halfway up the sides of the ramekins to yield gentle and even cooking.
- Bake: Bake for 40 to 45 minutes, or until the custard is just set and a knife inserted near the center comes out clean, indicating it is fully cooked but still creamy.
- Cool and Chill: Remove ramekins from the water bath and allow them to cool to room temperature, then refrigerate for at least 2 hours to let the custard set completely.
- Serve: Sprinkle with ground nutmeg before serving if desired for added flavor and aroma.
Notes
- Always strain the custard mixture before baking to ensure a silky smooth texture without lumps.
- You can infuse the milk with cinnamon sticks or citrus zest while warming it for an added flavor twist.
- Using room-temperature eggs helps the custard mixture combine more evenly and prevents curdling.
- Prep Time: 15 minutes
- Cook Time: 45 minutes
- Category: Dessert
- Method: Baking
- Cuisine: American
Nutrition
- Serving Size: 1 ramekin (about 6 ounces)
- Calories: 180
- Sugar: 20g
- Sodium: 130mg
- Fat: 7g
- Saturated Fat: 3g
- Unsaturated Fat: 3.5g
- Trans Fat: 0g
- Carbohydrates: 22g
- Fiber: 0g
- Protein: 7g
- Cholesterol: 155mg


