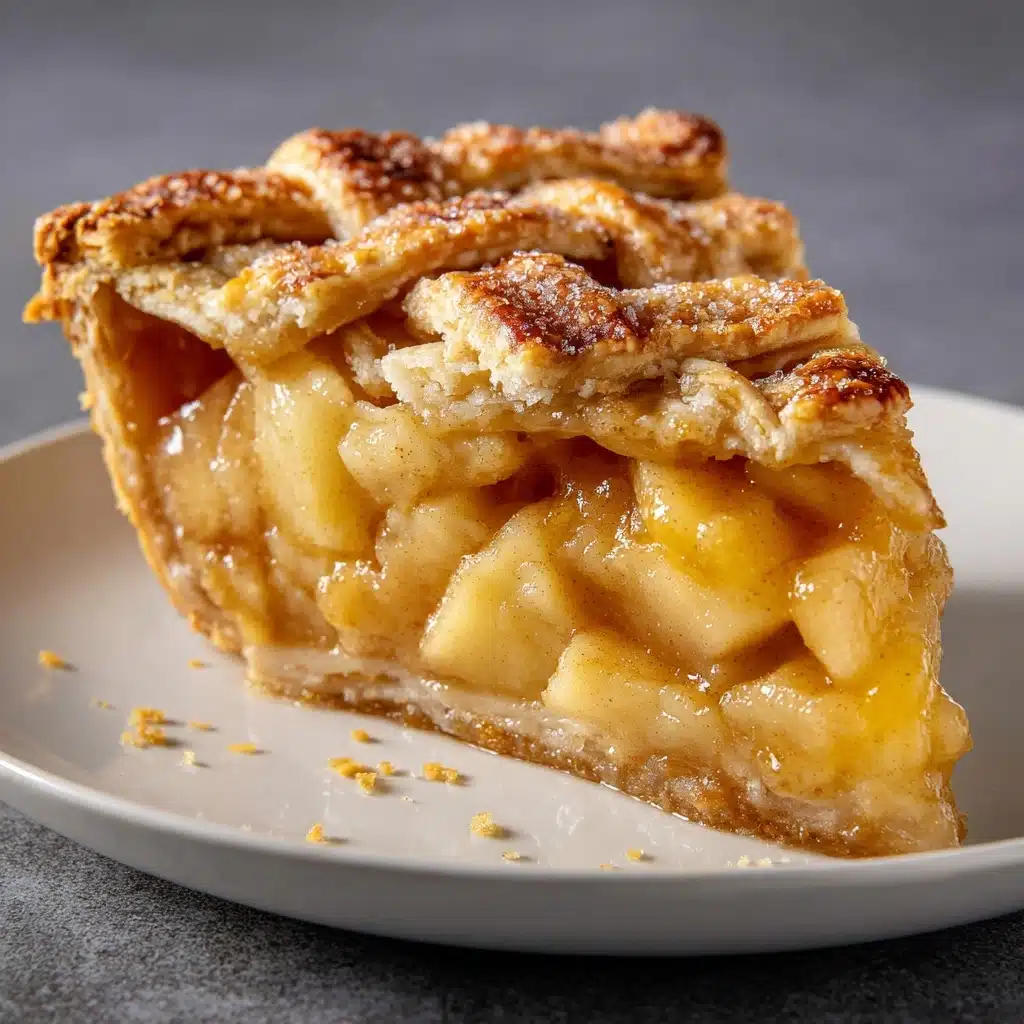
Mastering a Flaky Pie Crust is like unlocking the secret to bakery-style pies right in your own kitchen. With its tender, buttery layers and irresistible golden color, this classic recipe sets the stage for everything from holiday fruit desserts to savory quiches. The best part? You only need a handful of simple ingredients and a few pro tips to achieve that perfect balance of crispness and melt-in-your-mouth texture. Whether you’re a seasoned baker or venturing into pies for the first time, this Flaky Pie Crust will become your new go-to favorite.
Ingredients You’ll Need
Ingredients You’ll Need
The beauty of a Flaky Pie Crust is in its simplicity: each ingredient plays a starring role in the flavor and texture of the finished pastry. Quality and temperature are key, so aim for fresh, cold basics to get those signature delicate layers.
- All-purpose flour: The foundation of your crust—make sure to measure it accurately for the best texture.
- Salt: Enhances all the flavors and keeps your crust from tasting flat.
- Granulated sugar (optional): Adds a hint of sweetness and brings out golden color, especially great for dessert pies.
- Unsalted butter (cold and cubed): This is the hero that creates the flakiness, so keep it icy cold for the best layers.
- Ice water: Helps bring the dough together without melting the butter, ensuring those coveted flaky pockets.
How to Make Flaky Pie Crust
Step 1: Combine the Dry Ingredients
Start by grabbing a large mixing bowl and whisking together the all-purpose flour, salt, and sugar if you’re using it. This helps distribute the flavor evenly throughout the dough and ensures the crust bakes up with a consistent texture. Take a moment to break up any clumps in the flour—it makes a difference!
Step 2: Cut in the Butter
Add the cold, cubed unsalted butter right into your flour mixture. This is where the magic begins for your Flaky Pie Crust. Using a pastry cutter or, if you want, your fingertips, blend the butter in until the mixture looks like coarse crumbs with plenty of pea-sized chunks still visible. These little pockets of butter steam as your crust bakes, creating unrivaled flakiness.
Step 3: Add Ice Water Gradually
Next, sprinkle in the ice water, just a tablespoon at a time. Gently toss with a fork after each addition. Stop the moment the dough starts coming together—overmixing is the enemy of flakiness! Don’t worry if it looks a bit shaggy. It’ll smooth out when you bring it together by hand in the next step.
Step 4: Divide and Chill
Turn your dough out onto a lightly floured surface and divide it in half. Shape each half into a smooth disc, then wrap tightly in plastic wrap. Pop both discs into the refrigerator to chill for at least one hour; this rest time is crucial for developing that flaky texture and making the dough easier to roll out later.
Step 5: Roll Out and Use
When you’re ready to bake, dust your work surface with flour and roll out one dough disc to fit your pie dish. Move gently from the center outward to keep the round even. Lift it into your pan, trim any overhang, and get creative with crimped edges or simple folds. Now your Flaky Pie Crust is ready for filling or blind-baking, depending on your recipe.
How to Serve Flaky Pie Crust
Garnishes
Dress up your finished pie with a sprinkle of coarse sugar, a brush of egg wash for shine, or even a touch of flaked sea salt. For sweet pies, a light dusting of powdered sugar or a dollop of whipped cream adds a delightful finish that makes every slice a little celebration.
Side Dishes
Classic pies made with this Flaky Pie Crust shine alongside a cool scoop of vanilla ice cream or a tangy fruit compote. For a savory version, consider pairing with a crisp green salad or roasted vegetables to balance the richness of the pastry.
Creative Ways to Present
Turn individual crusts into hand pies, rustic galettes, or charming mini tarts. Use cookie cutters to make fun decorative toppers or intricate lattice patterns. Sometimes, just letting a beautifully golden crust speak for itself on a simple ceramic plate is all the presentation you need.
Make Ahead and Storage
Storing Leftovers
If you find yourself with extra Flaky Pie Crust or baked crust leftovers, simply wrap them tightly in plastic wrap and store in the fridge for up to 3 days. The crust should maintain its flavor and tender texture for delightful snacking or repurposing.
Freezing
Pie dough freezes beautifully. Wrap dough discs well and stash them in the freezer for up to three months. When ready to use, thaw them overnight in the refrigerator before rolling out. This is a fantastic way to always have a homemade Flaky Pie Crust on hand for spontaneous baking adventures.
Reheating
If your baked crust (or filled pie) needs a quick crisp-up, pop it into a 350°F oven for about 10 minutes. This revives the flakiness and brings back the irresistible aroma of fresh pastry. Avoid microwaving, as it can make the crust soft or soggy.
FAQs
How do I avoid tough pie crust?
Be gentle! Overmixing the dough or adding too much water can develop gluten, making the crust chewy instead of flaky. Mix just until the dough starts to hold together, then chill before rolling.
Can I use salted butter instead of unsalted?
Yes, you can use salted butter if that’s what you have on hand, but skip the added salt in the recipe or reduce it slightly to avoid an overly salty Flaky Pie Crust. Unsalted butter gives you more control over the flavor.
My dough cracked when rolling it out—what can I do?
If your dough is cracking, it might be too cold or a bit dry. Let it sit at room temperature for a few minutes to soften, and lightly press any cracks back together as you roll.
How do I blind bake the Flaky Pie Crust correctly?
To blind bake, line the rolled-out crust with parchment paper and fill with pie weights or dried beans. Bake at 375°F for 15–20 minutes until the edges are set and lightly golden. This keeps the crust crisp, ready for no-bake fillings.
Can I make this crust gluten-free?
Absolutely! Substitute a cup-for-cup gluten-free flour blend for the all-purpose flour, and check that your blend contains xanthan gum for structure. The process is the same and the results are deliciously close to traditional Flaky Pie Crust.
Final Thoughts
There’s nothing quite like a homemade Flaky Pie Crust, and with a little practice, yours will rival any bakery’s. Give this recipe a try, and see how it brings new texture, flavor, and confidence to all your pies—sweet or savory. Happy baking!
Print
Flaky Pie Crust Recipe
- Total Time: 1 hour 15 minutes
- Yield: 2 pie crusts (enough for one double-crust pie or two single-crust pies) 1x
- Diet: Vegetarian
Description
Learn how to make a deliciously flaky pie crust at home with this easy recipe. Perfect for both sweet and savory pies, this buttery crust will take your pie game to the next level.
Ingredients
Dry Ingredients:
- 2 ½ cups all-purpose flour
- 1 teaspoon salt
- 1 tablespoon granulated sugar (optional for sweet pies)
Wet Ingredients:
- 1 cup (2 sticks) unsalted butter (cold and cut into cubes)
- 6–8 tablespoons ice water
Instructions
- Prepare the Dough: In a large mixing bowl, combine the dry ingredients. Add the cold butter and cut it into the flour until crumbly. Slowly add ice water, mixing until the dough forms.
- Chill the Dough: Divide the dough, shape into discs, and chill for at least 1 hour.
- Roll Out the Dough: Roll out the dough on a floured surface to fit your pie dish.
- Bake: Follow your pie recipe’s instructions for baking.
Notes
- Keep all ingredients cold for a flakier crust.
- Freeze dough for up to 3 months.
- If blind baking, use pie weights and parchment paper.
- Prep Time: 15 minutes
- Cook Time: 0 minutes (plus chilling)
- Category: Basics
- Method: No-Cook
- Cuisine: American
Nutrition
- Serving Size: 1/8 of crust
- Calories: 210
- Sugar: 0g
- Sodium: 150mg
- Fat: 14g
- Saturated Fat: 9g
- Unsaturated Fat: 4g
- Trans Fat: 0g
- Carbohydrates: 18g
- Fiber: 1g
- Protein: 2g
- Cholesterol: 30mg


