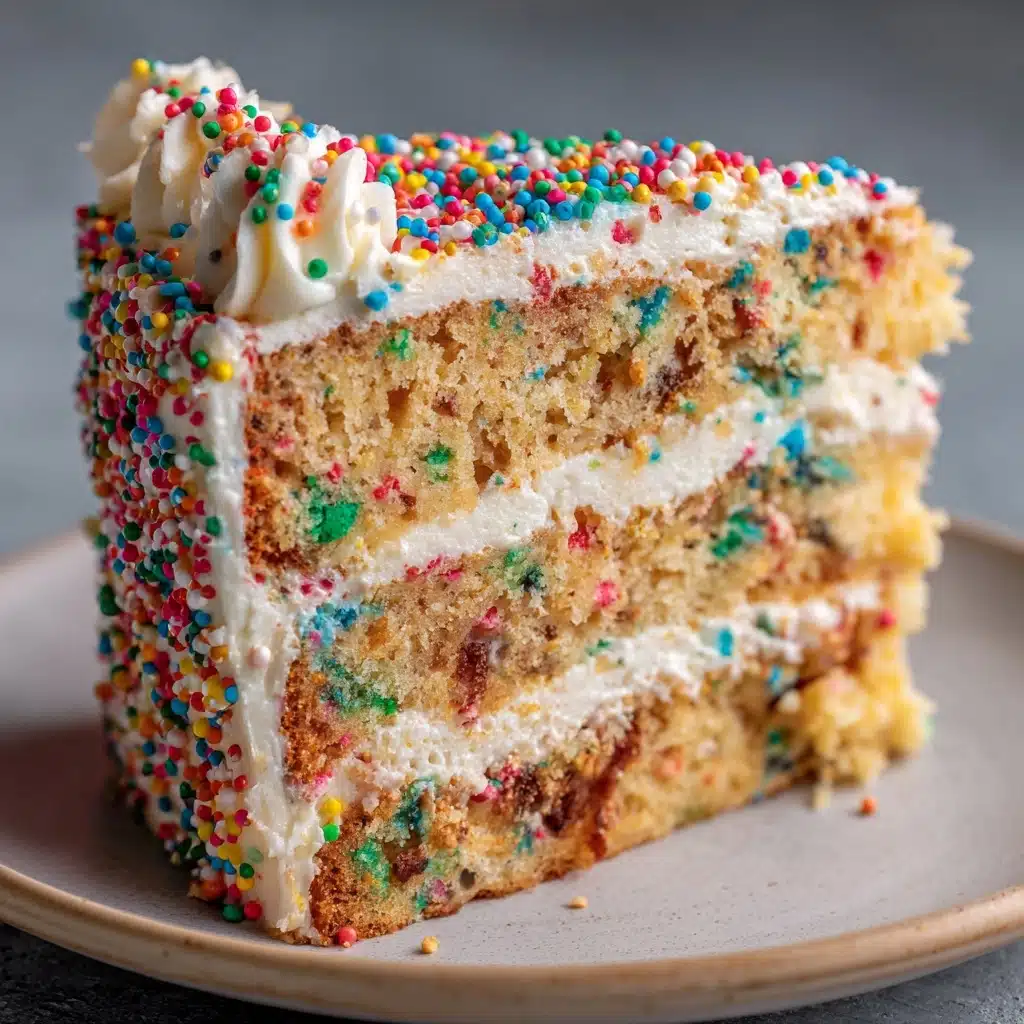
There’s nothing quite like a slice of homemade Funfetti Layer Cake to make any day feel like a celebration! It’s vibrant, fluffy, and bejeweled with a riot of rainbow sprinkles throughout its tender crumb. This cheerful cake is surprisingly easy to master, with layers of classic vanilla flavor, creamy vanilla buttercream, and pops of color that bring instant smiles to kids and grown-ups alike. Whether it’s a birthday, an impromptu gathering, or you just feel like baking something special, Funfetti Layer Cake is your ticket to pure joy, all from your own kitchen.
Ingredients You’ll Need
This cake shines with simple pantry staples and joyful bursts of color. Each ingredient plays a vital role in achieving the signature softness, flavor, and eye-catching sprinkles that make Funfetti Layer Cake so irresistible.
- All-purpose flour: The classic building block for sturdy yet tender, fluffy cake layers.
- Baking powder: Gives the cake its rise, ensuring each layer is light and airy.
- Salt: Just a pinch to balance the sweetness and enhance flavor depth throughout.
- Unsalted butter (softened): Adds rich flavor and a melt-in-your-mouth crumb; soft butter creams best for lightness.
- Granulated sugar: Sweetens the cake and assists in creating a delicate texture when creamed with butter.
- Large egg whites: Keep the cake’s color light and lend extra fluffiness to each slice.
- Vanilla extract: Don’t skimp—this forms the backbone of that nostalgic birthday cake flavor.
- Whole milk: Adds moisture and keeps the cake truly tender.
- Sour cream: The secret weapon for unbeatable richness and a soft, plush crumb.
- Rainbow sprinkles (jimmies style): Crucial to that classic Funfetti look—jimmies hold their color in the batter without bleeding.
- Frosting butter (unsalted, softened): Makes your homemade vanilla buttercream extra smooth and dreamy.
- Powdered sugar: Creates a fluffy, sweet frosting that spreads like a dream.
- Heavy cream or milk: A splash creates a luxurious, spreadable texture for your frosting.
- Vanilla extract (for frosting): Rounds out the buttercream with classic vanilla richness.
- Pinch of salt (for frosting): Balances sweet frosting and enhances the vanilla notes.
- Extra sprinkles for decorating: Take your Funfetti Layer Cake from delightful to dazzling!
How to Make Funfetti Layer Cake
Step 1: Prep Your Pans and Oven
Begin by preheating your oven to 350°F (175°C). Grease and line three 8-inch round cake pans with parchment paper to guarantee the cake releases easily later. This small step is key to beautiful, mess-free layers and a stress-free cake assembly—it’s worth every second!
Step 2: Whisk the Dry Ingredients
In a medium bowl, whisk together the flour, baking powder, and salt. Mixing these first ensures that the leavening and seasoning is perfectly even throughout your cake, preventing any surprises in texture or rise.
Step 3: Cream the Butter and Sugar
Using a stand mixer or hand mixer, beat the softened butter and granulated sugar together until the mixture looks pale and fluffy—about 2 to 3 minutes. This step is crucial for incorporating air into the batter, which leads to the light, cloud-like texture that makes Funfetti Layer Cake so delightful.
Step 4: Add Egg Whites and Vanilla
Add in the egg whites and vanilla extract, then beat again. The egg whites keep everything light, and the vanilla begins building that signature cake flavor. Mix until the batter is well-blended and smooth.
Step 5: Incorporate the Sour Cream and Alternating Ingredients
Stir in the sour cream gently—it adds unbeatable moisture and tenderness. Now, alternate adding the dry flour mixture and the milk to the batter, starting and ending with the dry ingredients. This careful sequence helps prevent over-mixing and keeps your layers tender and even.
Step 6: Fold in the Rainbow Sprinkles
Now for the magic! Gently fold the jimmies-style rainbow sprinkles into the batter. Be delicate here—mix just until they’re incorporated to preserve the bright colors and prevent any bleeding, ensuring beautiful, confetti-flecked layers.
Step 7: Bake the Layers
Divide the batter evenly among the three prepared pans. If you want truly perfect layers, use a kitchen scale to weigh each pan. Smooth the tops and pop them into the oven. Bake for 22 to 25 minutes, or until a toothpick inserted in the center comes out clean. They’ll emerge golden and just starting to pull away from the edges.
Step 8: Cool the Cake Completely
Let the cakes cool in their pans for about 10 minutes—this allows them to set and come out cleanly. Then, carefully invert onto wire racks and let them cool completely. This step is especially important for a Funfetti Layer Cake, as it keeps the crumb intact for frosting later.
Step 9: Make the Vanilla Buttercream Frosting
For that classic birthday cake touch, beat the butter until creamy and smooth. Gradually add powdered sugar, then drizzle in the heavy cream (or milk), vanilla extract, and a pinch of salt. Beat until the frosting is fluffy and luscious—you want something spreadable but able to hold up tall layers.
Step 10: Assemble and Decorate the Funfetti Layer Cake
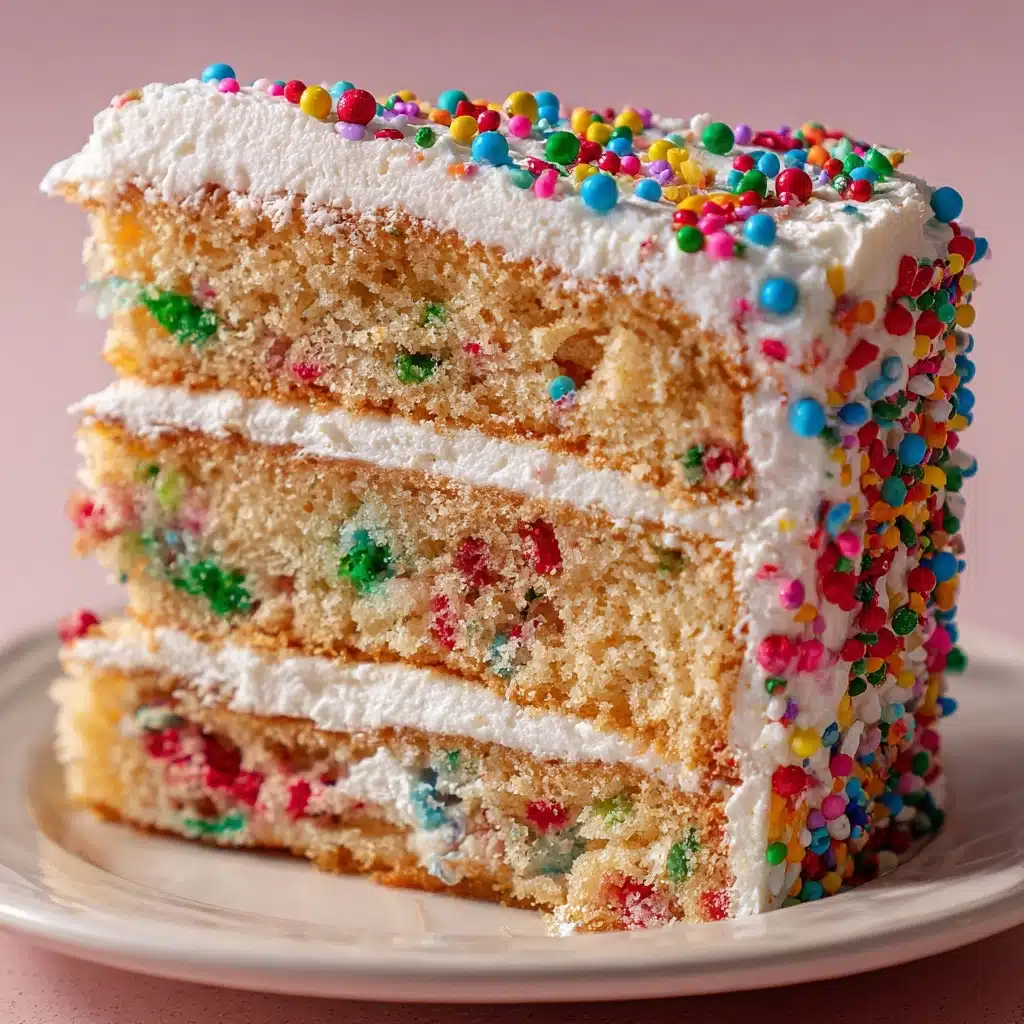
Once your layers are completely cool, it’s time to assemble. Place one layer on your cake plate and spread a generous amount of frosting on top. Repeat with the next two layers, then cover the whole cake with the remaining frosting, smoothing the sides and top. Finally, shower the cake with a generous handful of extra sprinkles for a true Funfetti finish!
How to Serve Funfetti Layer Cake
Garnishes
For that picture-perfect look, pile on even more colorful sprinkles over the top and around the base right before serving. If you’re feeling a bit extra, try adding swirls of piped buttercream or mini meringues for extra flair—just keep it fun and festive!
Side Dishes
This cake is so playful, it’s best paired with simple, fresh accompaniments that let it shine. Think bowls of fresh berries, scoops of vanilla ice cream, or a glass of cold milk. If coffee or tea is more your speed, they both make excellent partners for a slice of Funfetti Layer Cake.
Creative Ways to Present
Make your Funfetti Layer Cake the centerpiece by serving on a pretty stand, surrounded by confetti or streamers. For celebrations, try adding sparkler candles or cake toppers. You can even slice the cake into colorful wedges and arrange on a platter, or serve parfait-style cups with alternating cubes of cake and dollops of frosting for a fresh take.
Make Ahead and Storage
Storing Leftovers
Cover any leftover Funfetti Layer Cake tightly with plastic wrap or transfer to an airtight cake keeper. Store at room temperature for up to two days—if your kitchen is warm, refrigerate instead. The frosting will keep everything moist, and the flavors often deepen after a day!
Freezing
Funfetti Layer Cake freezes beautifully. Wrap individual slices or whole unfrosted layers tightly in plastic, then foil, and freeze for up to three months. Thaw overnight in the fridge or at room temperature for a couple of hours before frosting and serving. It’s a lifesaver for prepping ahead of parties or birthdays.
Reheating
This cake is best served fresh or at room temperature, but if you prefer a slightly warm slice, you can microwave individual pieces for about 10 seconds. Be careful not to overheat or the buttercream may melt—a touch of warmth brings out the vanilla aroma beautifully.
FAQs
Can I use nonpareils or other sprinkle types in Funfetti Layer Cake?
Stick with jimmies-style sprinkles for best results, as nonpareils tend to bleed their color into the batter, creating muddy hues instead of clean, cheerful confetti spots. Jimmies hold their shape and color for picture-perfect layers every time.
How can I make my cake layers extra even and neat?
For the most even cake layers, use a kitchen scale to divide the batter precisely between your pans, and smooth the tops before baking. If you want truly pro results, you can even trim cooled layers with a serrated knife before assembling the Funfetti Layer Cake.
Can Funfetti Layer Cake be made gluten-free or dairy-free?
Absolutely! Swap the all-purpose flour for a good 1:1 gluten-free baking blend, and use dairy-free butter, milk, and sour cream substitutes. The crumb may be slightly different, but you’ll still get a festive, delicious result.
What’s the best way to transport the finished cake?
Assemble the cake on a sturdy, flat cake board and chill for at least 30 minutes to set the frosting. You can then gently wrap it in plastic wrap or use a cake carrier. Drive with care, and decorate with extra sprinkles or toppings once you’ve reached your destination for maximum wow.
Can I make cupcakes instead of a full Funfetti Layer Cake?
Definitely! Divide the batter among lined cupcake tins, filling each about two-thirds full. Bake at 350°F for 15 to 18 minutes, or until set. Swirl on buttercream and sprinkle away for perfectly portable, party-ready funfetti cupcakes.
Final Thoughts
If you’re looking to stir up some joy in your kitchen, this Funfetti Layer Cake is the ultimate crowd-pleaser. It’s impossibly tender, full of color, and practically guarantees smiles with every slice. Give it a try—the process is half the fun, and the reward is a slice of pure celebration, no matter the occasion!
Print
Funfetti Layer Cake Recipe
- Total Time: 1 hour (plus cooling)
- Yield: 12 servings 1x
- Diet: Vegetarian
Description
Indulge in the colorful, festive delight of a Funfetti Layer Cake. This moist and fluffy vanilla cake is speckled with rainbow sprinkles and layered with a creamy buttercream frosting. Perfect for birthdays, celebrations, or any occasion that calls for a fun and delicious dessert.
Ingredients
For the cake:
- 2 ½ cups all-purpose flour
- 2 ½ teaspoons baking powder
- ½ teaspoon salt
- ¾ cup unsalted butter, softened
- 1 ¾ cups granulated sugar
- 4 large egg whites
- 1 tablespoon vanilla extract
- 1 cup whole milk
- ½ cup sour cream
- ½ cup rainbow sprinkles (jimmies style, not nonpareils)
For the frosting:
- 1 cup unsalted butter, softened
- 3 ½ cups powdered sugar
- 2 tablespoons heavy cream or milk
- 1 teaspoon vanilla extract
- Pinch of salt
- Extra sprinkles for decorating
Instructions
- Preheat oven to 350°F: Grease and line three 8-inch round cake pans with parchment paper.
- Prepare the cake batter: Whisk together flour, baking powder, and salt. Beat butter and sugar until fluffy. Add egg whites and vanilla, then mix in sour cream. Alternate adding dry ingredients and milk, then fold in sprinkles.
- Bake the cakes: Divide batter between pans and bake for 22–25 minutes. Let cool before frosting.
- Make the frosting: Beat butter, add powdered sugar, cream, vanilla, and salt until smooth.
- Decorate the cake: Frost the layers, stack, and cover with frosting. Decorate with extra sprinkles.
Notes
- Use jimmies sprinkles to prevent color bleeding.
- Cake layers can be frozen for later use.
- Weigh the batter for even layers.
- Prep Time: 25 minutes
- Cook Time: 25 minutes
- Category: Dessert
- Method: Baking
- Cuisine: American
Nutrition
- Serving Size: 1 slice
- Calories: 510
- Sugar: 45g
- Sodium: 190mg
- Fat: 25g
- Saturated Fat: 15g
- Unsaturated Fat: 8g
- Trans Fat: 0g
- Carbohydrates: 68g
- Fiber: 1g
- Protein: 4g
- Cholesterol: 55mg
